O Gauge Modelling on the GWR
A personal Journey
Creating your own transfers
I made enquiries as to how my own PO transfers could be created and as I only wanted about 6 sets this would be prohibitively expensive. So I found a company that makes clear waterslide decal paper, Mr Decal paper, available through Amazon.
First I needed an accurate layout of a supposed West Country brewery and the following came up on the internet. Click any picture to see a larger version of it.
![]()
So I put the images I had collected into a free program called Irfanview, resized them to 640 x 480 and took out the background and tidied up the lettering as best I could, (pressing f12 displays the tools in Irfanview to help you do this). Its a great little program for sorting images.
Printing in the above program is not great so i used Corel Paintshop X2 to arrange the pieces of the transfer in its Print layout facility. Here the transfer has been split into three parts, the curved top name and two straight lines of details.
![]()
Select Print layout from the File pull-down menu as shown here.
![]()
You drag each piece on to the page layout and arrange as required, then print out the result on the special A4 paper. I checked the size of the transfers against a van side and found that a length of about 10.5 cms was about right.
![]()
Once printed out the next step is to allow the print to dry. Then coat each part with varnish. You can apply three coats of spray varnish, I painted one slightly thicker coat on and allowed to dry over night. As shown here.
![]()
Next i took just the curved transfer the next day after the varnish had thoroughly dried, cut it out close to the lettering and put it into a water bath for about 1 min. then I transferred it to a mock up of a brick building i had to see what the end result might look like:
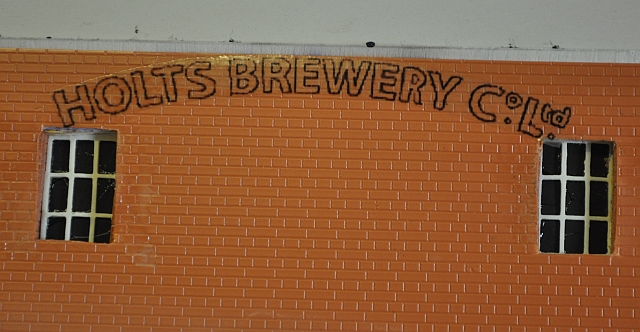
As the transfer is clear the letters come out clear as well. I'm about to paint in the letters with white before varnishing to see what that might look like but so far the results are pleasing.
So here is one of the Standard 12T vans roughly finished.
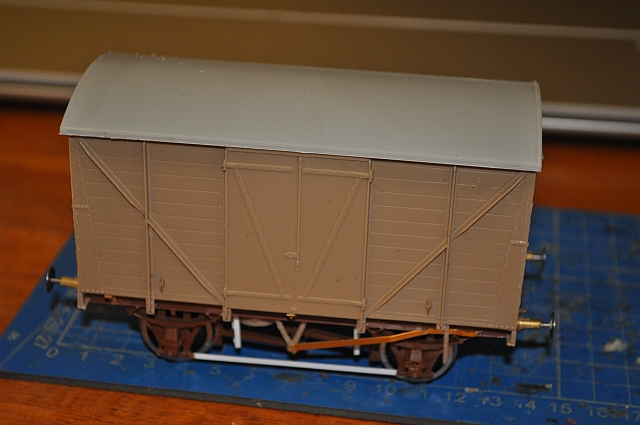
The framing on the side of the van is quite proud of the boarding as is the door sitting proud of the side. This will mean that putting my transfers straight onto the van will be done in sections. The large curved title will have to be cut into several pieces.
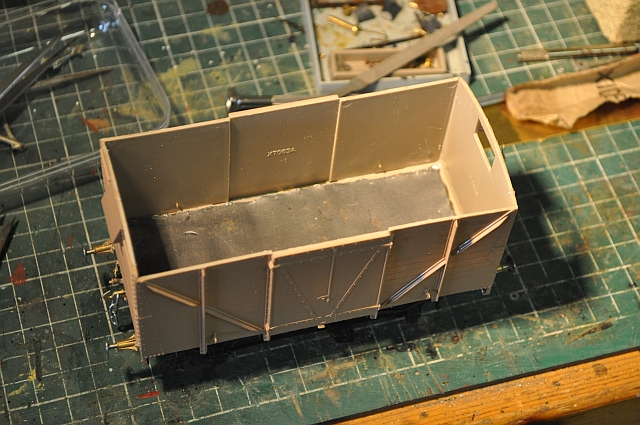
The van is now completed and the undercarriage has been painted black and the boarding dark stone. You will see that a slab of lead has been stuck inside the van to give it some weight. I leave the roof till last as far as sticking it in place is concerned.
The sides of the van have been painted dark stone and left to dry over night. Next the transfers were cut out close to the lettering.

Then the difficult bits. As the van has really marked surface detail this makes it impossible to apply the transfers in one go or even as one word. So the approach was to cut the words carefully to fit either side of the proud detail.
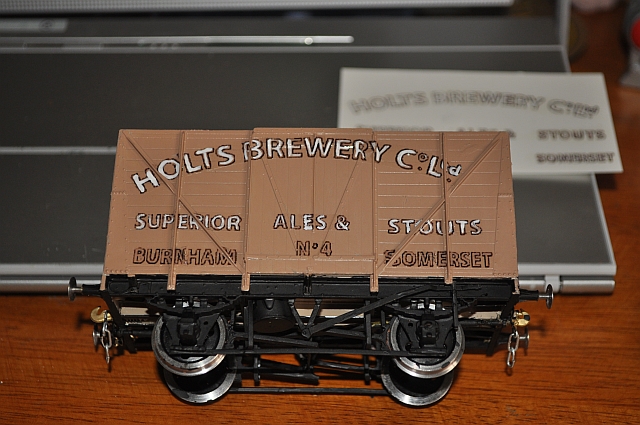
This is the end result of one side. Took about half an hour of careful cutting. One good thing about this approach is that the varnish seal stops the transfer rolling up into a tight unusable piece of soft stuff which is what i hate about most transfers and lining sets!! as this is my first attempt and the finished article will be weathered its not bad.
Inkjet water slide transfers
An experiment!