O Gauge Modelling on the GWR
A personal Journey
The New Railway
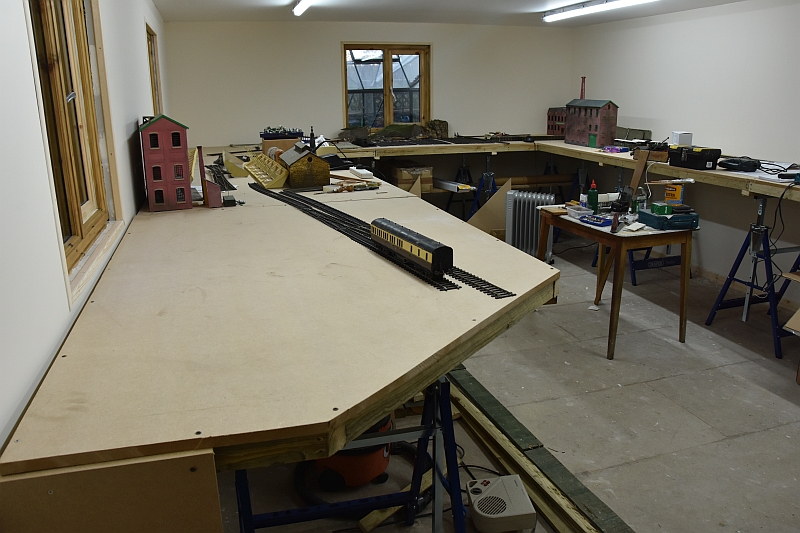
The building work for the new railway having been finished I moved in early in 2021. I completely dismantled the old railway keeping all the buildings stock and extras. All the old stands and baseboards were demolished, everything else packed carefully into a huge number of boxes. The work carried out is shown below on a month by month basis. The latest developments coming up first. The start is at the bottom of this page
August 2023
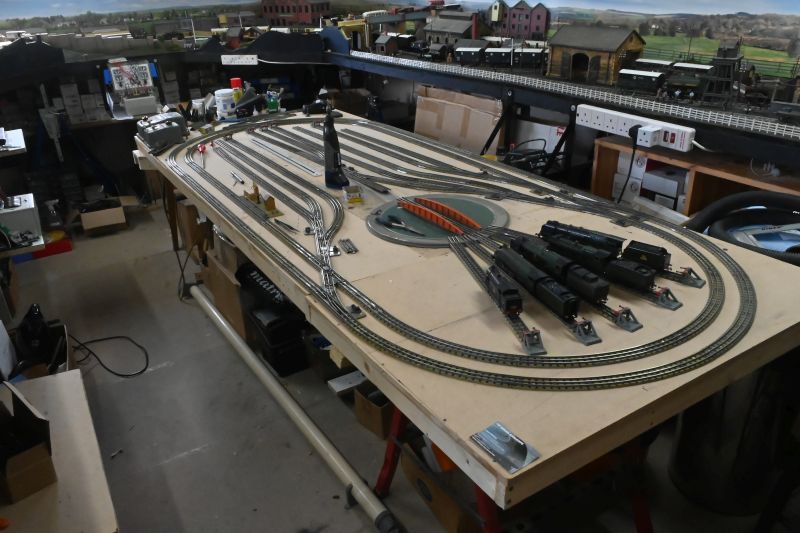
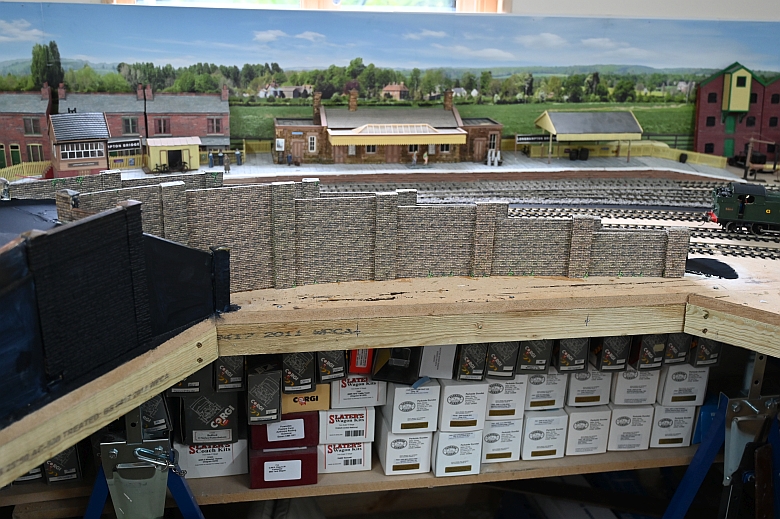
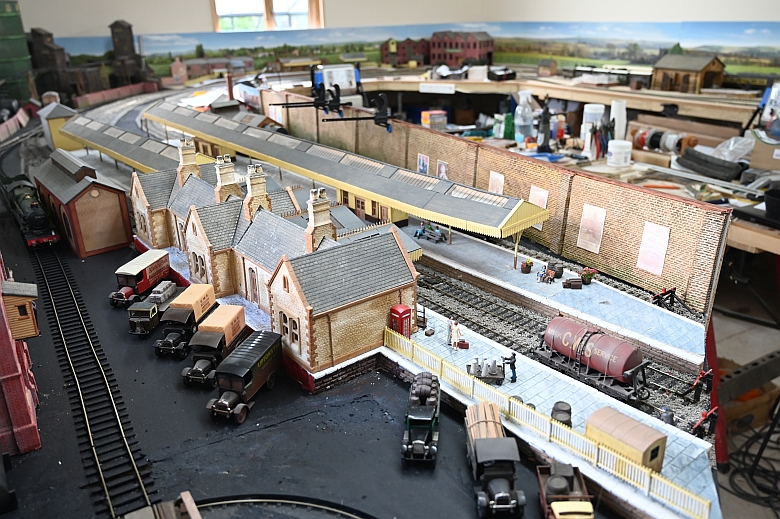
The O gauge layout has progressed slowly. The electrification of points and signals have yet to be completed but electrification of all the track is complete. The control panels have been redesigned to integrate point and signnal control with a display board as well. There are four control cwntres for the layout and a bell system will connect all four.
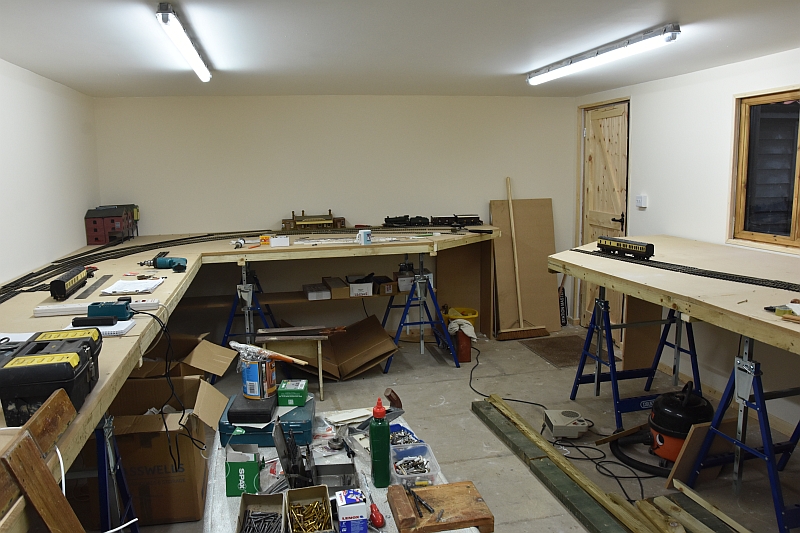
Nov 2022
All my Hornby Dublo kit was still in boxes and as such could not be seen, admired or used so I decided to make up a baseboard in the centre of the room and create a shunting diaorama.
May 2022
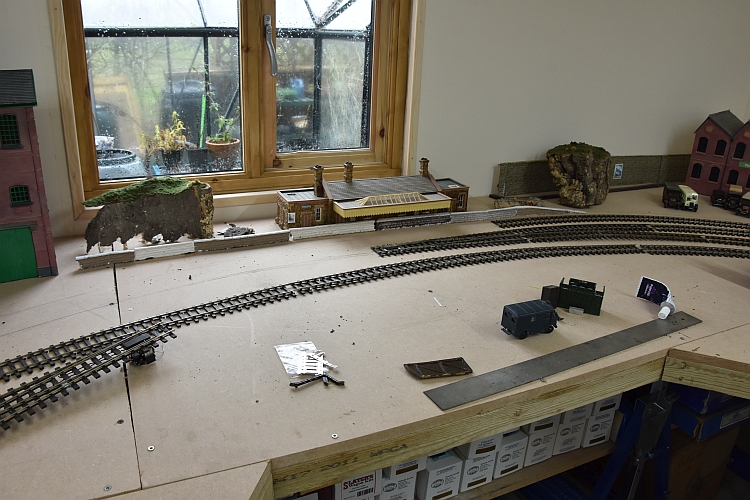
Landscaping and track ballasting are slowly moving clockwise around the railway. I have reverted to applying the ballast first and then using a water spray to moisten the gravel finally apply dilutedPVA using hypodermic cyclinder. In this way about a metre of track is done at anyone time. When dry it can be cleaned and tested before moving on to the next piece.
January 2022
Two sets of small people to find homes for on the railway. Preiser do a good range of ready painted figures.
November-December 2021
The road bridges are now completed. A small level crossing on the branch line and roads marked out ready for landscaping. Dean Goods loco finally retrieved from its box and track tested, but not much more to report.
October 2021
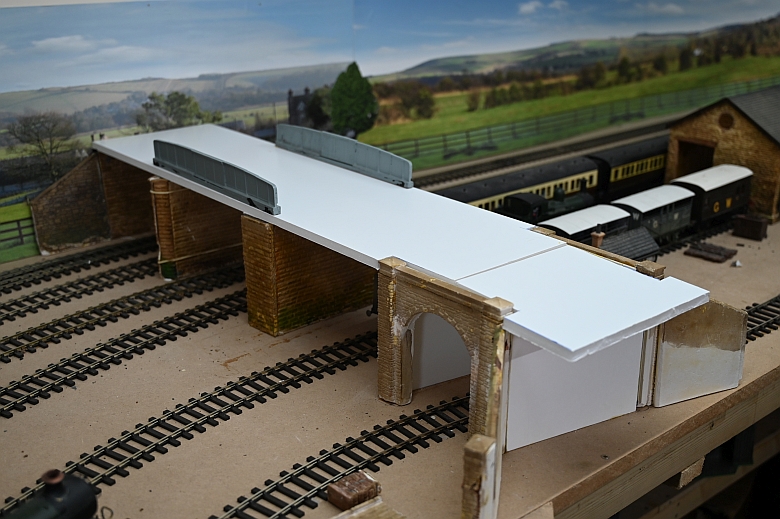
The third road bridge is now taking shape and shown here are the bare bones of it:
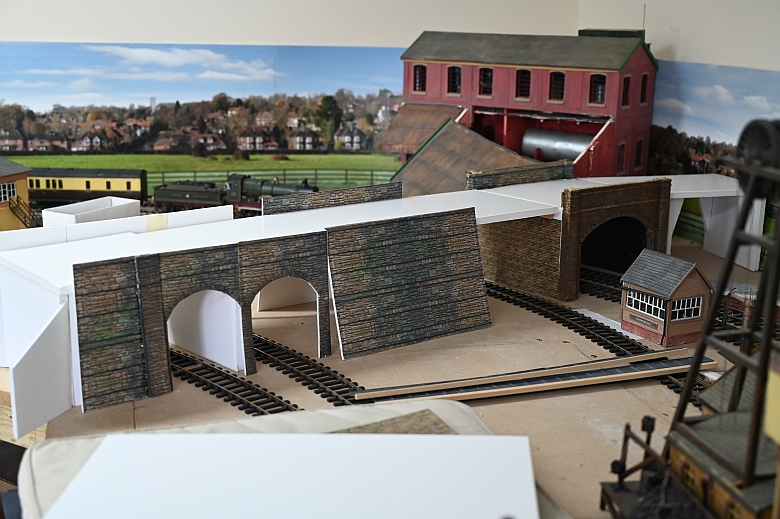
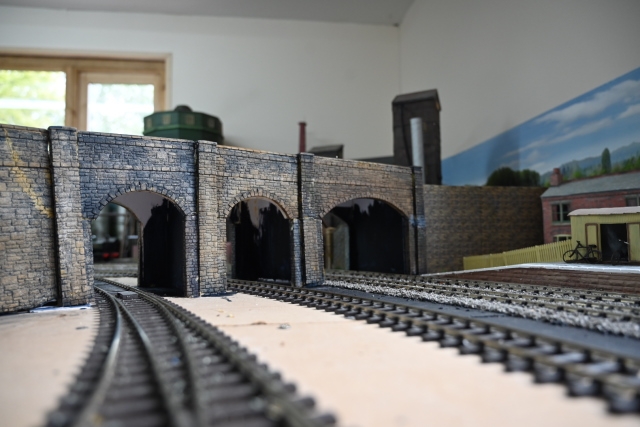
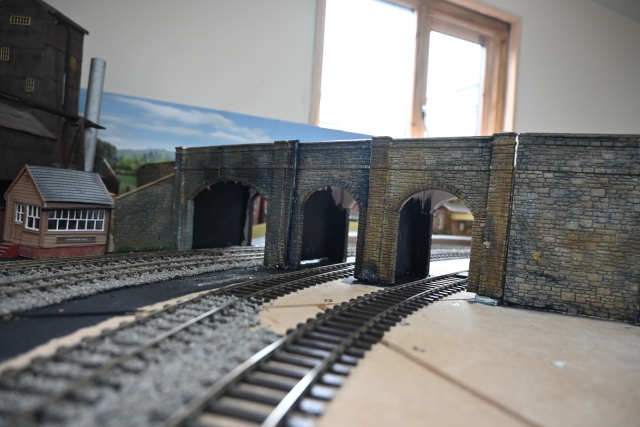
As you can see from the above, thick boarding was used to construct the framework for the bridge. This is then covered by brick papers made up from photographing the plaster tunnel entrances at the other end of the tracks. These images are then cut spliced and put back together in layers to create the large ewalls you see here. Using Microsoft's Publisher to print them out on yellow thick paper. the results are shown here below:
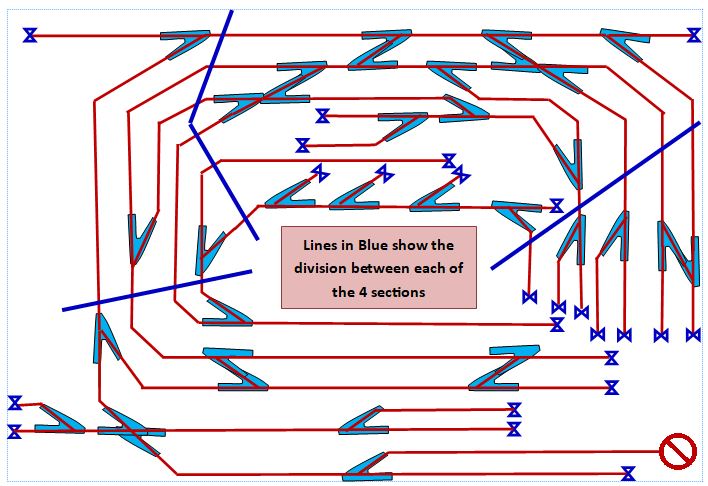
A few additions to the track and now a diagrammatical look at the layout as shown here|:
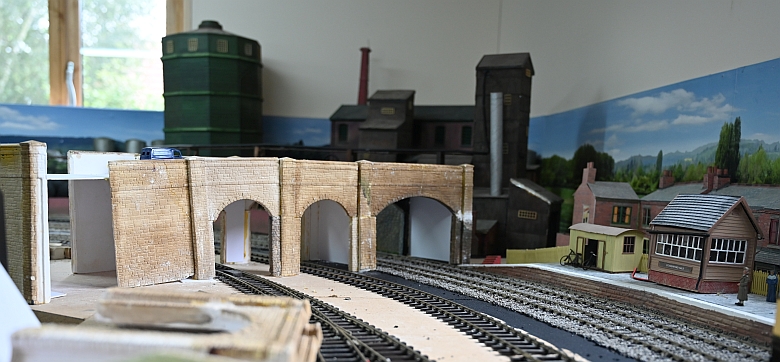
The bridge is completed using the standard 00 gauge PECO girders as shown here.
The second road bridge is now under construction. This bridge will divide the second and third sections of the railway up.
A quick along the line so far click the picture below to see a video of a journey along the line.:
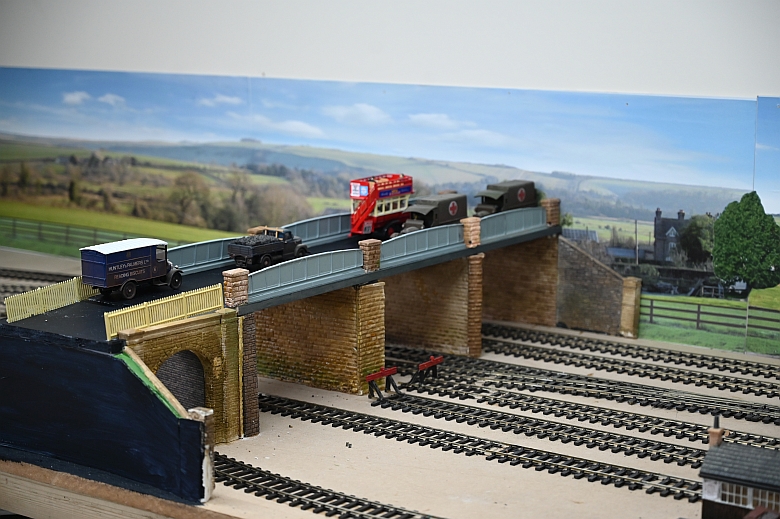
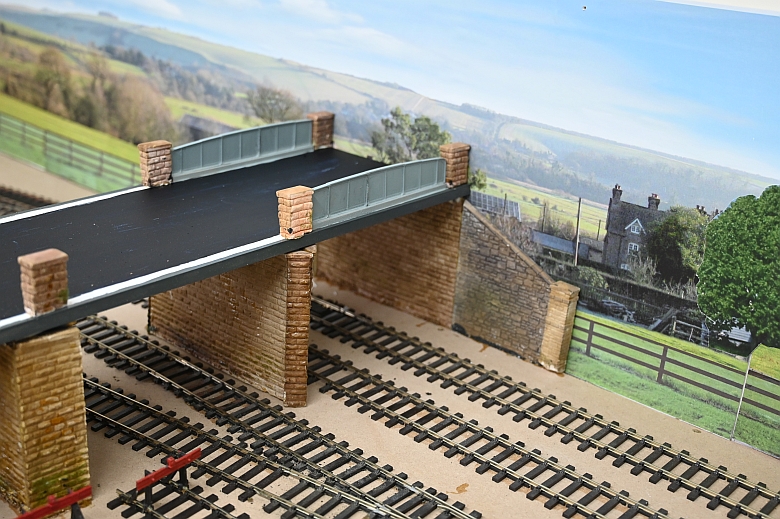
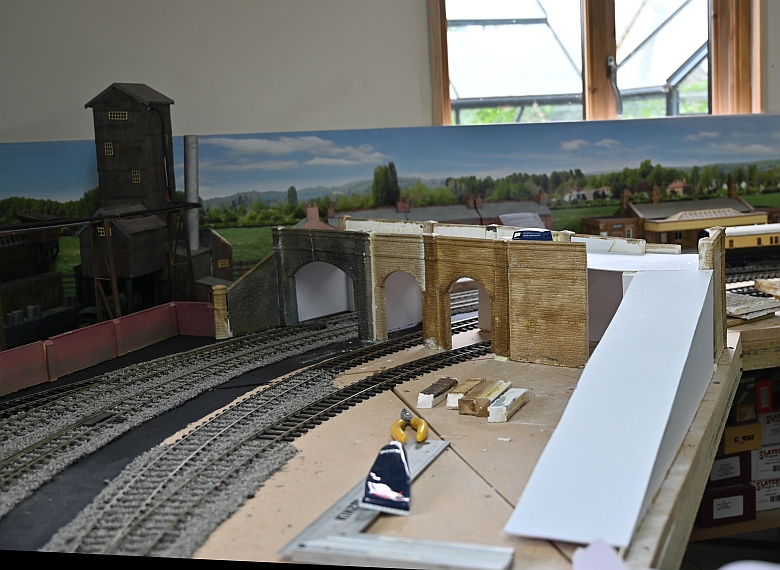
Moving onto the next dividing structure a large road bridge. This will have three retaining girder bridge tops made up from PECO girder bridges and Wills Bridge pieces, (although OO gauge looks the part once in place and painted).
September 2021
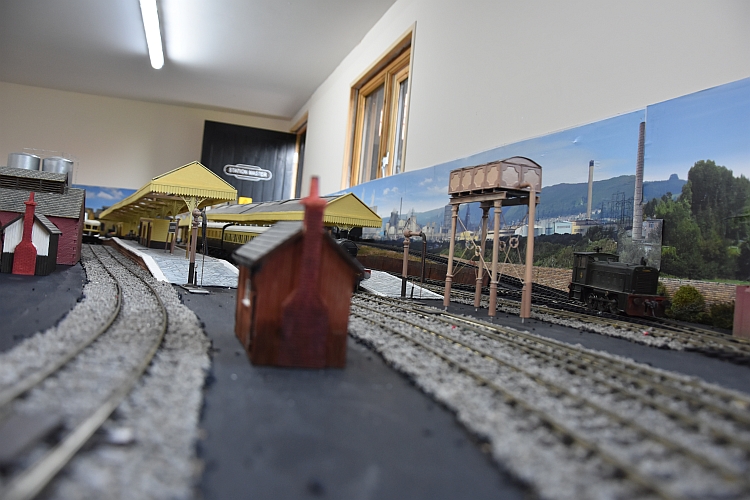
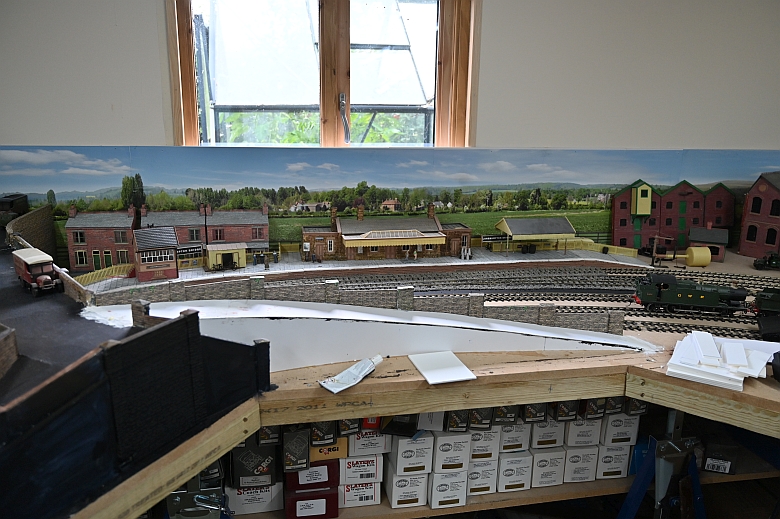
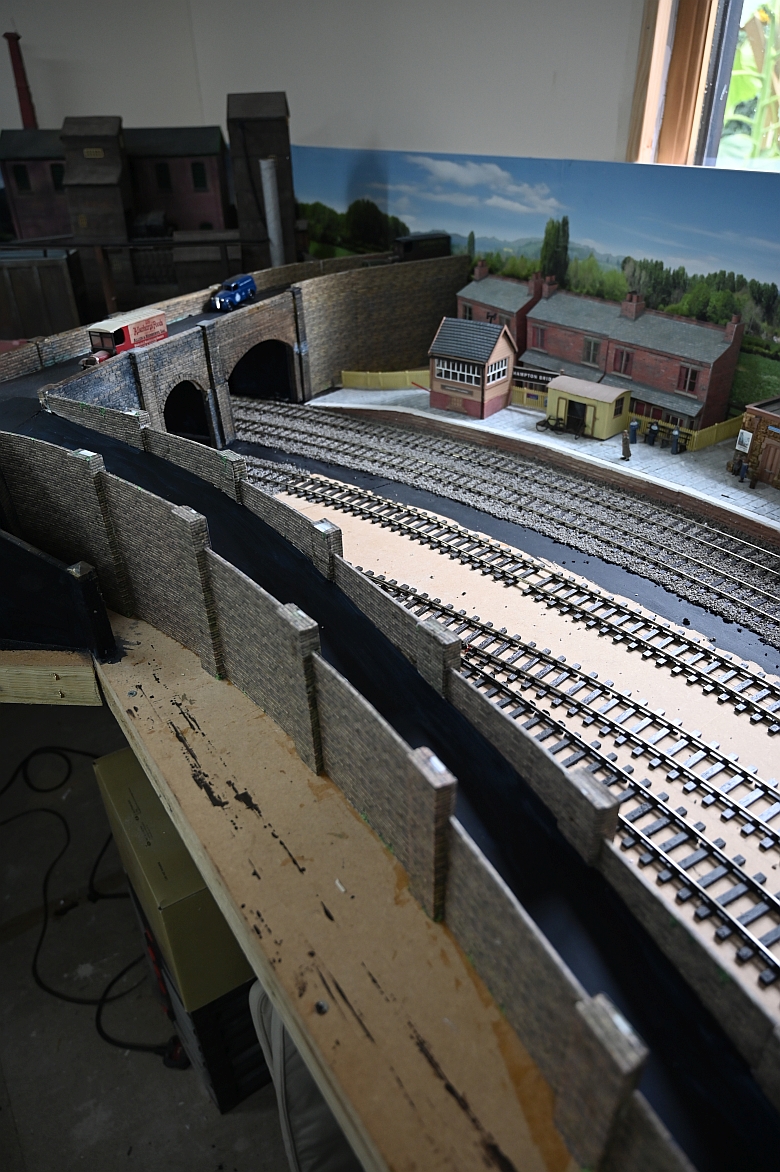
So to continue I am working on each of the four sections of the railway in a clockwise manner. Each area has been laid with track and some buildings have now come to rest in each area. The task now is to build the infrastructure for each in turn. All have their own platforms. The turntable has already been moved from one end of the railway to the other and other changes will take place if judged to be appropriate in building the whole. Currently I am working on the newly designed over bridge separating the first and section sections of the railway. .
 .
.
A second road access from the over bridge to allow traffic to gain access to the third part of the railway was necessary. I built up the infrastructure using foam board. This will be covered with the same thin foam board covered with brick paper. Each section of the retaining walls will have buttresses and these will be made up as a sandwich of different foam boards covered with the same brickpaper.
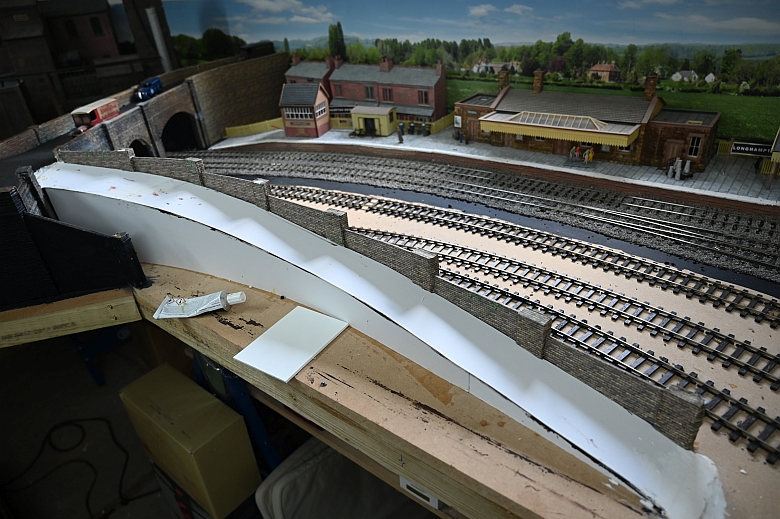
The far half of the retaining wall for the road is complete

The view from the trackside showing the buttresses
 .
.
The front side now completed.
The road is painted, The bridge now gives access to the front of sections 1 and 2,

Worked in some scenic support for the road walls.
August 2021
I use the construction of bridges to separate parts of the railway. Here is the first partition that creates a roads bridge across all the lines beside the gas works.
 .
.
And here a view from the station side
Now painted appropriately with the brickwork finished off.
and station side:
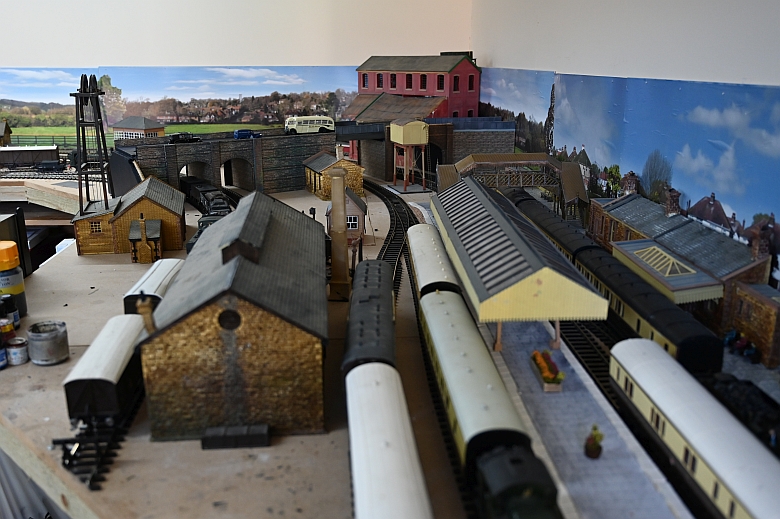
Along the front of the major station I have used the old embankment brickwork that I cast for a wall on the old railway as shown below. This has been glued onto card.:
 .
.
Here is the back view:-
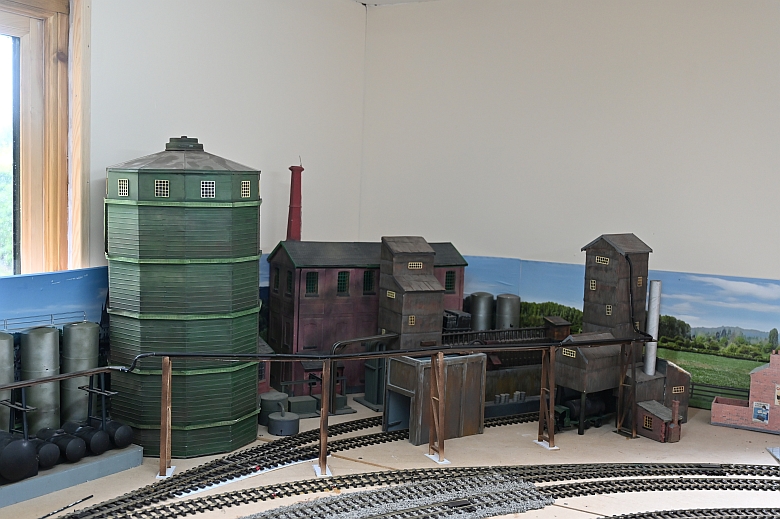
Rebuilding the gasworks. Having rescued most of the buildings for the gasworks from storage I set about constructing a completely new layout. There is little to be gained by trying to re create what was in the previous layout when a clean slate is much more appealing. This time there is much less space so the tar works and gas production buildings are incorporated as one. Here is a mock-up of what grew as a result
July 2021
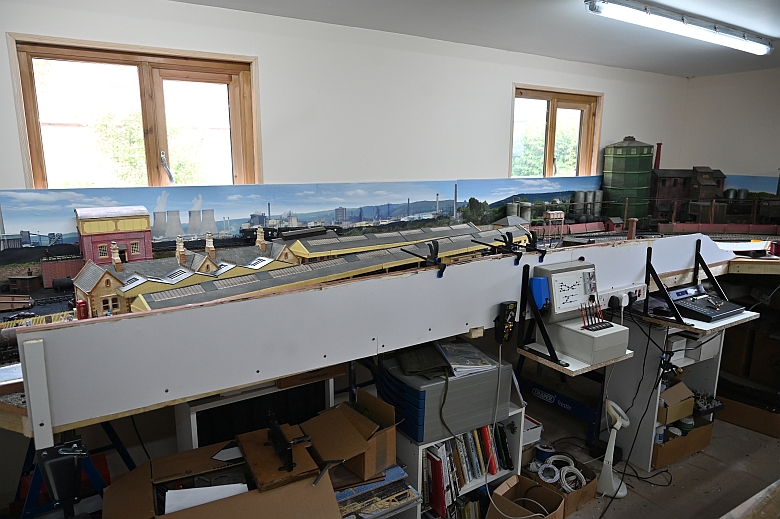
All the back scenes are now in place. Each 3 piece image was pasted onto light board and attached to the wall and not the baseboard. Some gritting of trackwork has been started, (a long business!).
June 2021
Its back to basics now. The track has been laid out according to my master plan and the points have been tested and given two sets of connectors to activate the solenoid and frog from the signal box units I have remodelled. I am currently looking to use Gaugemasters back scene images and the first section has been pinned up as a trial.
May 2021
A couple of changes to the track design. Click on it for a larger image.

April 2021
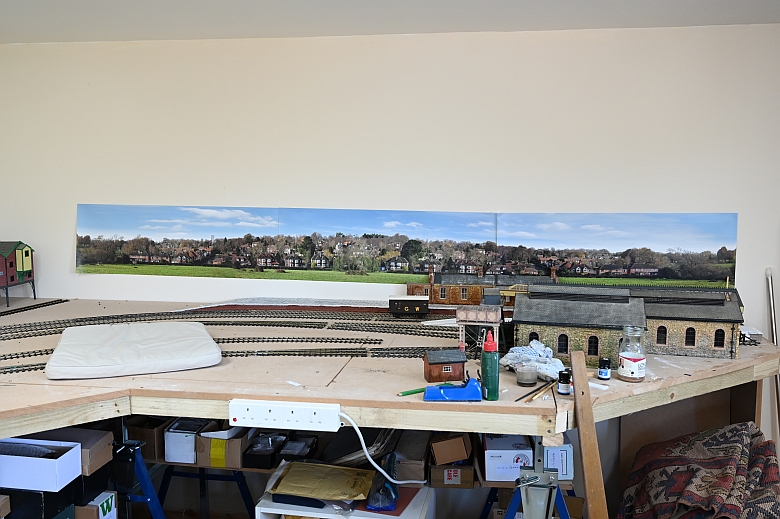
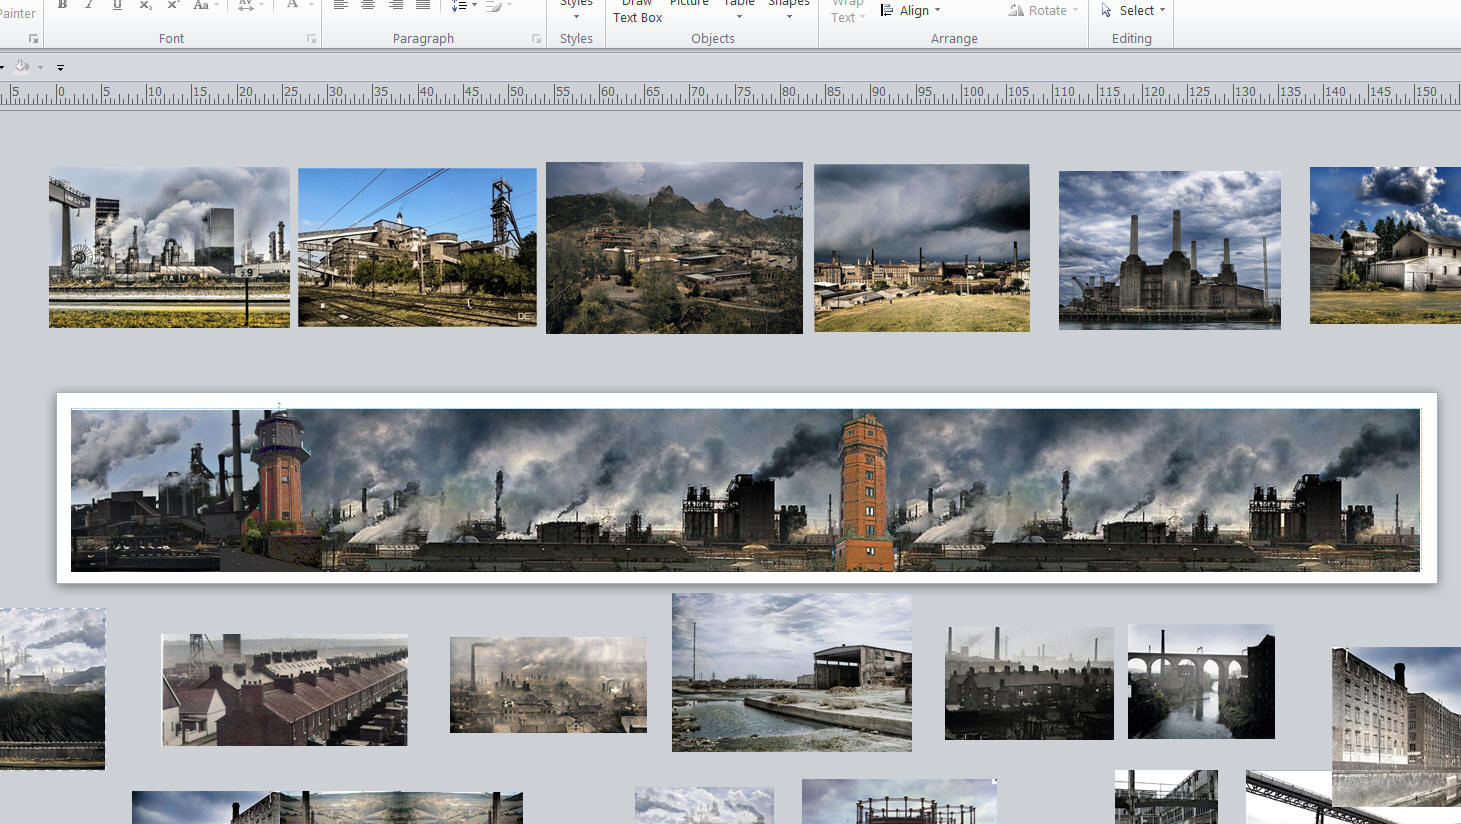
The block signalling system is mostly completed now and awaiting installation. Attention is now on the backdrops to give depth and colour to the railway. Microsoft Publisher has a series of publications that can help here. One I use is banner, (shown below). Using a selection of freely copyable images from the internet and cut and paste methods I create long panoramic views of towns, industry, seascapes etc. I will intersperse these with wall sections around the outside of the railway.
March 2021
Attention to the block signalling system. The lighting panels have been wired ready to be connected to the micro switches on the point motors. As I use the PECO ones there are two micro switches. |One to control the polarity of the frog and the other to control the indicator LEDs in the control panel which is part of the block signalling system.
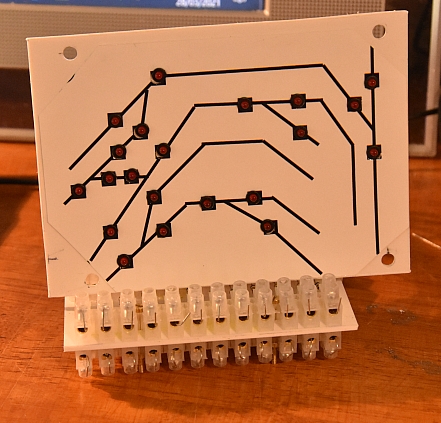
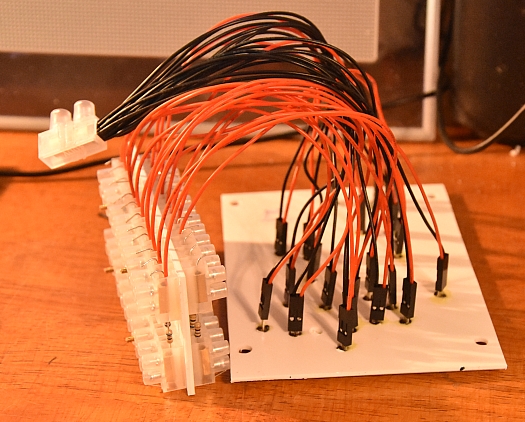
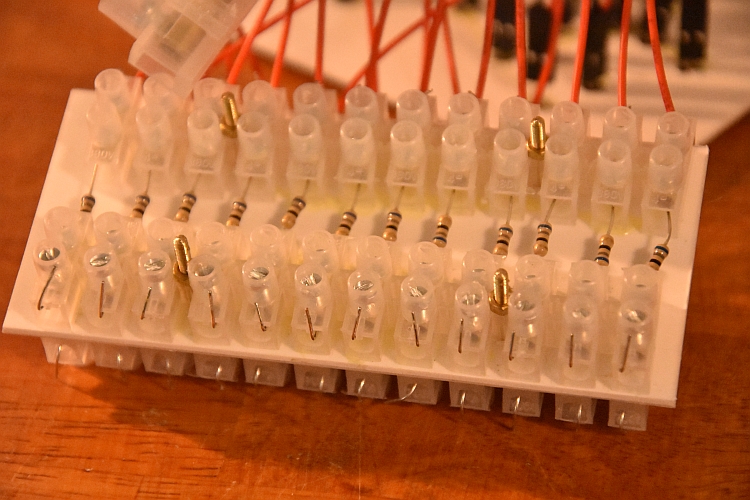
There are 4 boards like the one above to set up. I decided to use terminal connectors set on a plastic plate to incorporate the necessary resistors that LEDs require to operate.
February 2021
This is the current plan for the new railway. Click on it for a larger image. As it evolves buildings may be moved about.

I can see three stations developing on the railroad. I don't plan before hand as the site usually dictates what you can and cannot do. So here are the three below.
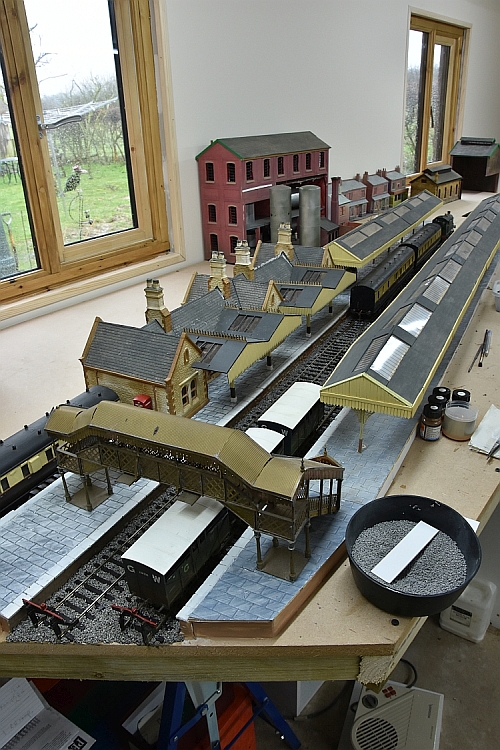
This is the largest terminus.
This is the middle station on the curve up line. One platform only..
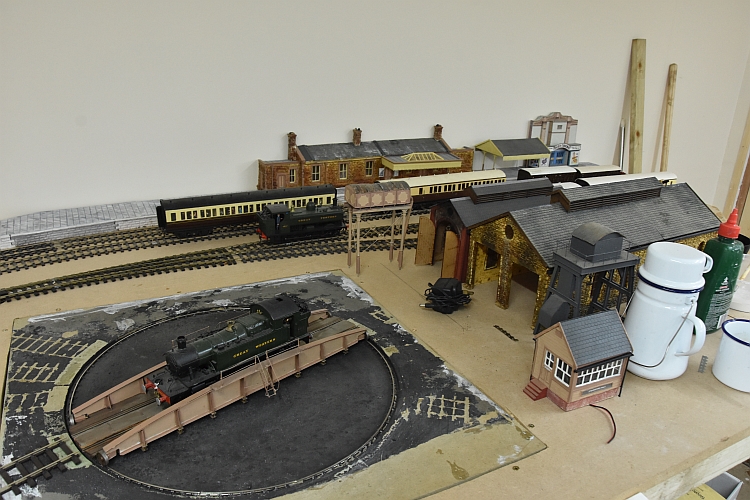
This is the other terminus. turntable insitu as well, so I will make this the more industrial end of the railway.
January 2021
The new railway room is now finished and I have moved in.

.
Making a fresh start after a move of house with a large railway
N.B. Most but not all images are clickable for a larger version