O Gauge Modelling on the GWR
A personal Journey
Scenery Techniques
This section was started some considerable time ago when the railway was in its infancy. I return to it now to continue to upgrade the railway with more realistic scenery. The rest of this page is worth a look but I will catalogue what comes next with links set out below.
To start with, a look at a before and after scenario:
|
 |
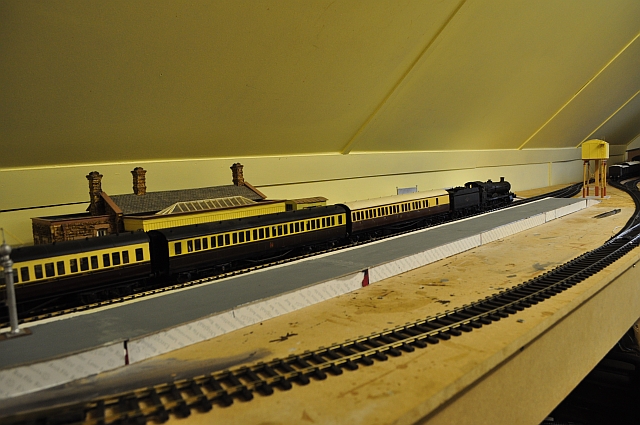
The photo on the left shows a flat platform built onto a flat baseboard of MDF. The siding line in the foreground comes near to the front edge of the baseboard and contains a number of turnouts further on. There is no building at present on this platform neither has any access been decided on. At best its unimaginative and lacks interest. I could just paint it all a mash up of dark colours and stick small buildings on it, but!
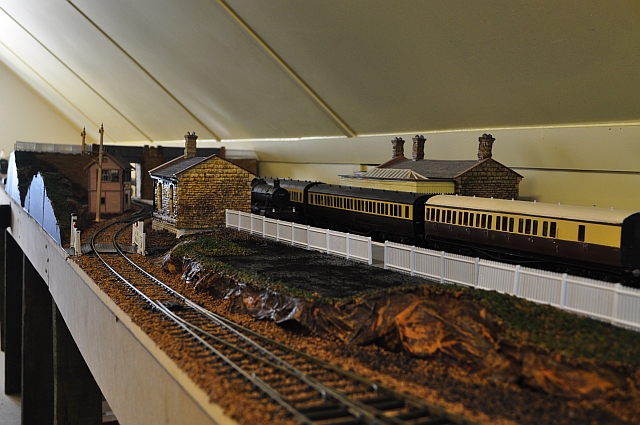
The photo below and the next two below show what can be done with a little imagination. Some of it is merely to fool the observer into thinking that the platform and mainline terminus track is raised up and this is achieved by sculpting carefully the foreground.
 |
 |
The method is as follows:
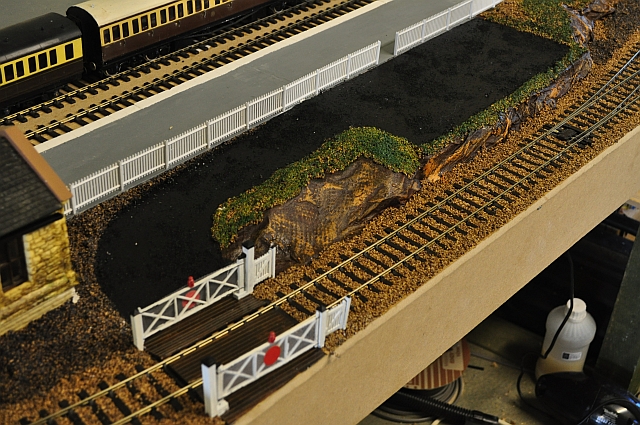
After building the car park in card, screw up newspaper to form a rough relief around its edges. Tack the newspaper to the baseboard and form using a hot glue gun.
Next mix a solution of PVA and 1/3 water, and soak strips of kitchen roll in it. You can wipe excess solution off the strips by dragging them across the edge of the container. Apply the wet strips over the newspaper to cover it. keep repeating the process until all the newspaper has been covered. don't worry too much about the shapes being created as this is going to be our 'skin' on which we will build. Automatically creases and dips will occur just like the real thing. Once enough has been applied leave to dry overnight. If it dries fairly quickly you can apply a coating of burnt umber acrylic over it to add to the skin and give an earthy grounding. It will remain flexible when dry. Usiung the right quality of PVA is important. You need to use that which dries transparent as many will leave a glossy film on the surfaces they are put on. Reeves used to make such but have stopped doing so. Spend abit of time looking around for the right one.
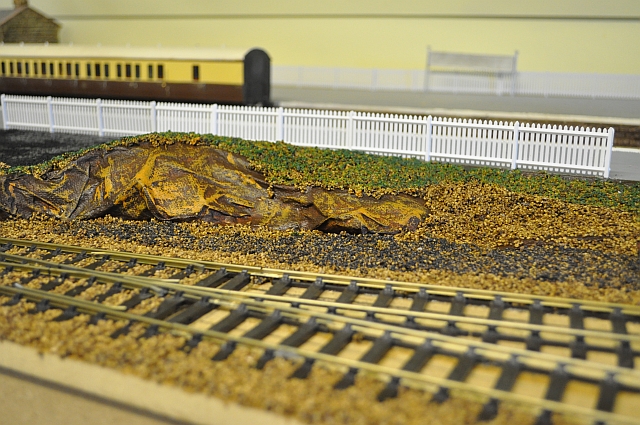
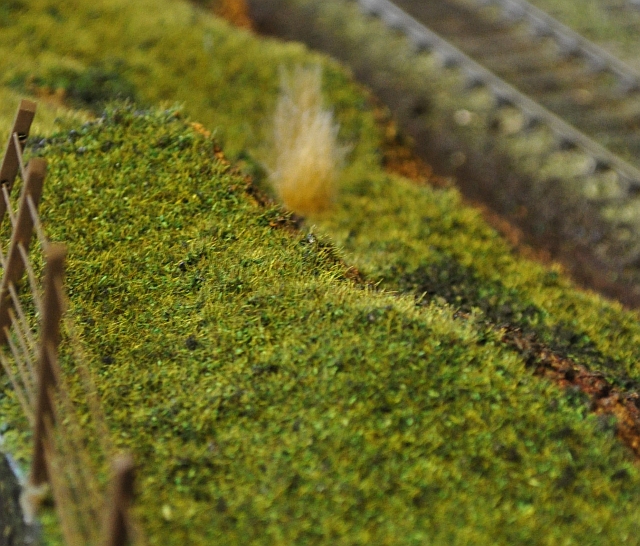 I decided to invest in a Noch Gras master. It uses static to 'plant' individual grass pieces onto scenery. A downside is that it can look very bowling green if the under structure is not set up properly beforehand. The base needs to be lumpy so that the grass tufts itself when sticking to the glue. I use the grit used for ballast and that seems to work very well. Adding in long grass by cutting fur and sticking/planting it also seems to give good results as shown here. |
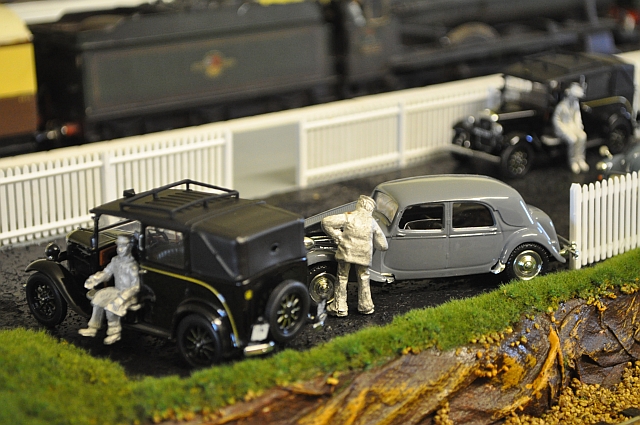 There will come a time when you need to consider adding folk with their inherent problems and situations and here a couple of cars and taxis are waiting for the next train to arrive. |
Scenery