My O Gauge Journal on
Modelling the GWR
A personal Journey
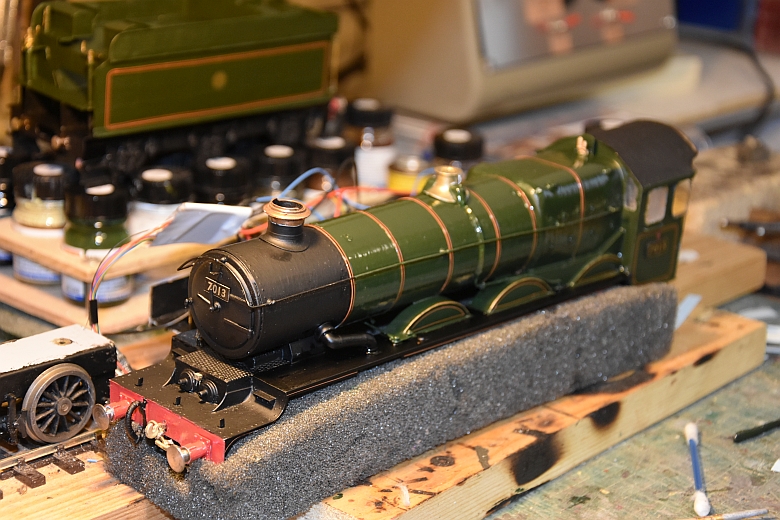
Lining the Locomotive
I must admit to making a complete hash of lining in the past so much so that I've undone and left locos in plain livery because of my seemingly inability to use transfers.
But this time having read up on what to do again and again and put a couple of helpful tools together its working out a lot better. So for anyone trying to use transfers in lining hope what follows helps!
I have Ian Rathbones excellent book on painting and Lining and taken his guidance on board. I highly recommend it. He is a master of the art!
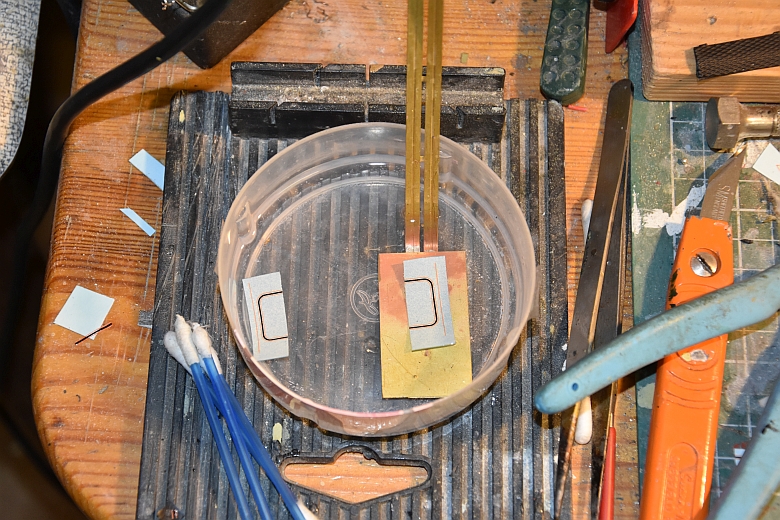
First what tools do you need to get the fragile transfers off their backing paper and onto the locomotive?
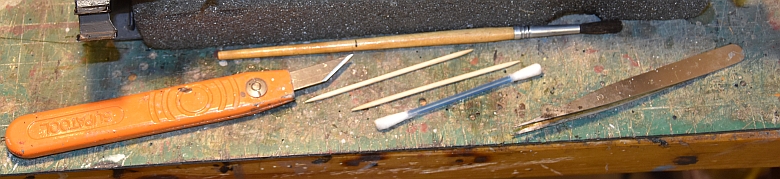
A sharp modellers knife, paintbrush soft and flexible to hold water, cocktail sticks to manipulate and 'nudge' the transfers into place, cotton wool buds to help soak up excess water and finally position your transfers in the chosen position and tweezers to hold the backing paper steady whilst teasing the transfer off it onto the loco body.
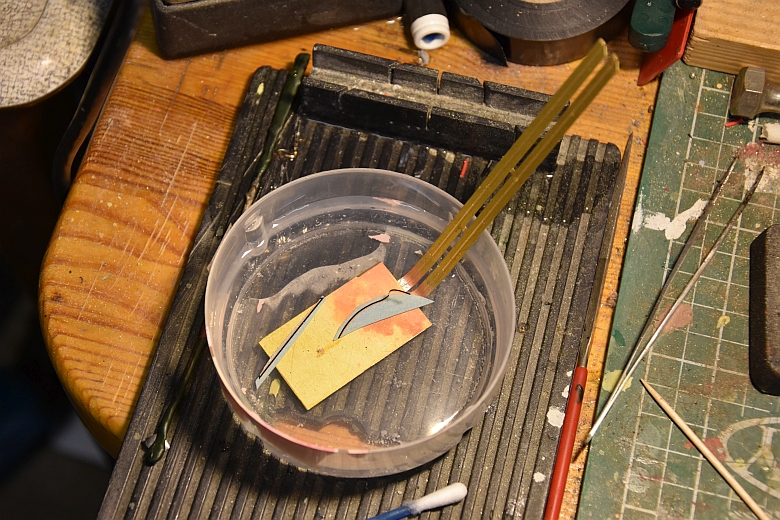
A shallow dish for the smaller transfers and a special plate with handle I made up from scrap brass to help remove the transfers from the dish and stop them turning over.
The first word of warning: YOU WON'T BE ABLE TO GET A COMPLETE TRANSFER ONTO THE LOCO IN ONE GO - so don't try it, you will only make a mess of the transfer.
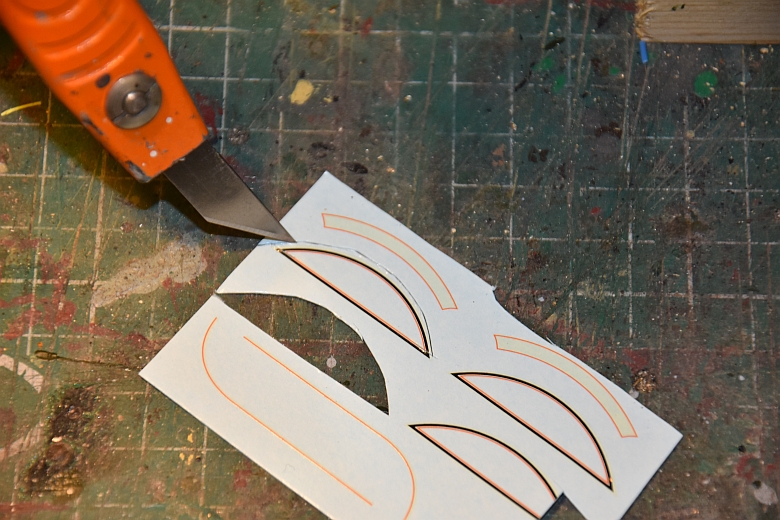
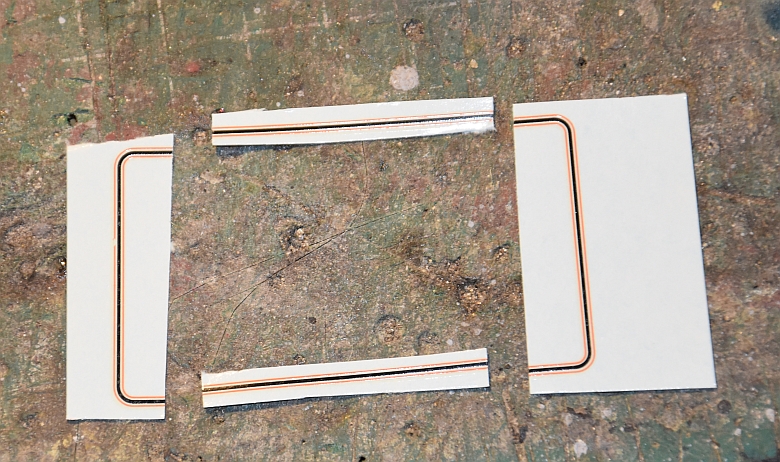
So the wheel cover transfers were cut into 3 pieces. The straight bottom, the curved top and a right hand section to finish off the job, (as shown above the right hand wheel arch still has the third bit to be installed).
Whatever the complete shape of the transfer you will have to cut it up into several bits and put each one on in turn butting them together. I made more progress this way! Ian's book describes this well. Here is the transfer cut ready to be applied a piece at a time to the back of the tender.
Second word of warning: ONLY DAB THE TRANSFER AND USE A COCKTAIL STICK TO CAREFULLY NUDGE IT INTO PLACE - if you stroke it with a brush to move it you will invariably move too much of it to somewhere you'd wish you hadn't! It will take some time to work it into place, and keep it wet until you are satisfied, then dab the excess water away using the cotton wool bud. You can also try rolling the head of the bud over the transfer to get any air or water out of it and it sometimes helps in getting small parts of the transfer straight.
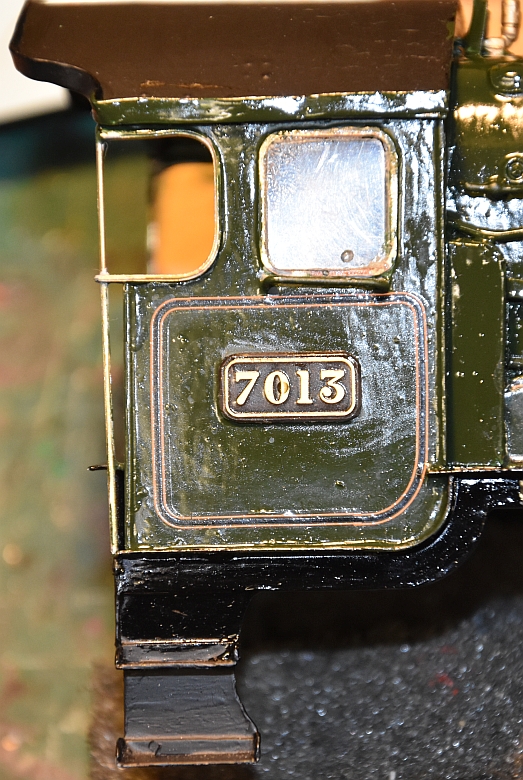
The cabside lining was in 4 pieces. As I mentioned earlier, a good technique for removing water after placing the transfers is to 'roll' a cotton wool bud over the transfer moving carefully along the length of the transfer after making sure it is straight.
To seal the transfer in place cover the whole area with a coat of matt varnish.
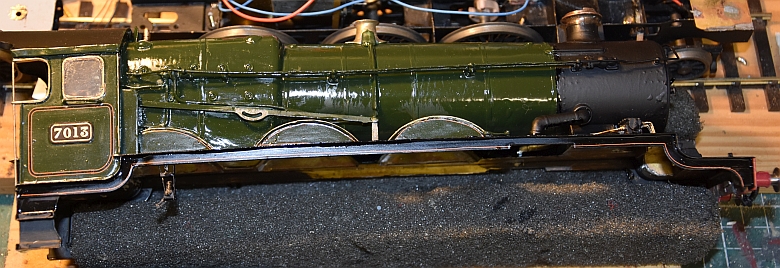
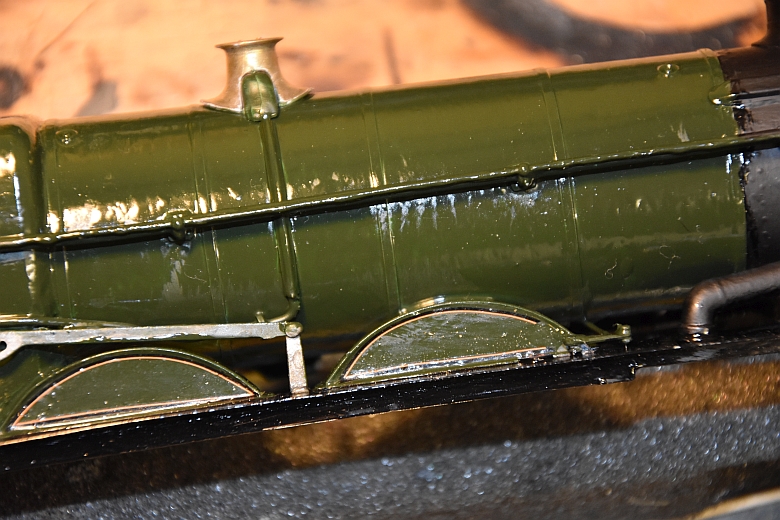
Here the side is almost finished with all transfers in place. Not an easy job getting the long lines straight. To fix them all in place a coat of matt varnish is required.
The tender was somewhat easier but also required getting the long straights as correct as possible. Much nudging with a cocktail stick and water helped.
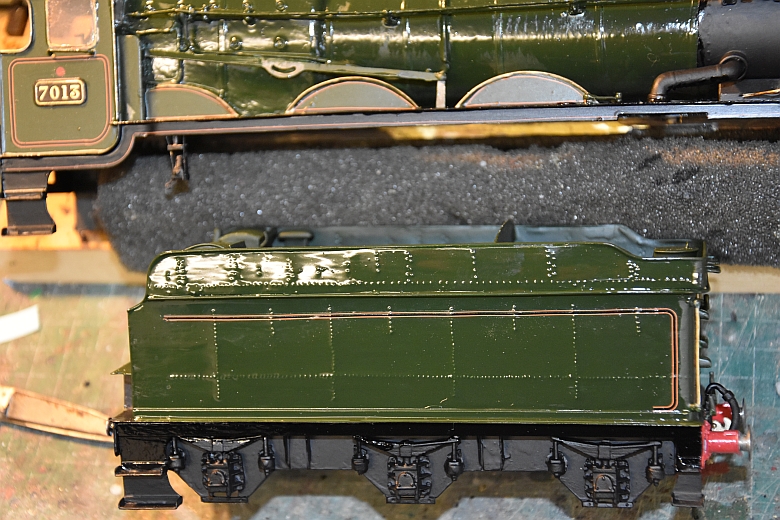
With the tender the lining was split into 4 parts. The long pieces are still hard to get right and much teasing is necessary and wetting with water.
Finally, two pieces, joined at the top and fixing the button transfer for GWR in place to complete the tank sides.
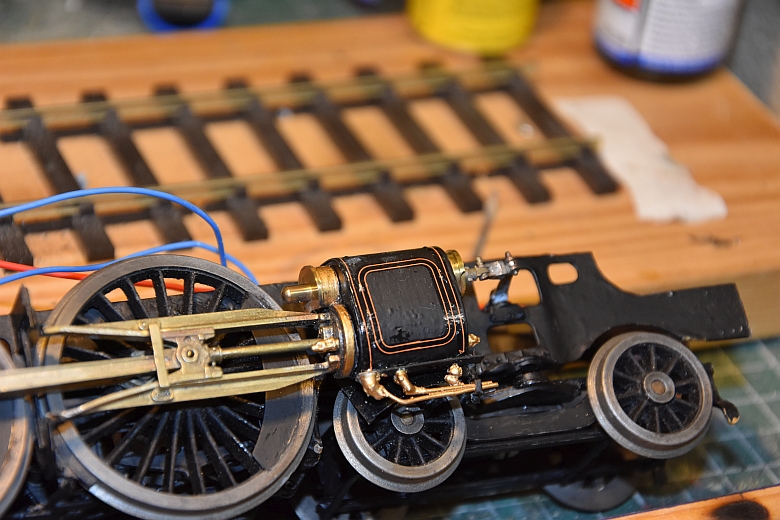
The last job is to provide for the piston chambers on the chassis with their transfers. I split the transfer into two halves down the middle as shown here.
Then carefully sliding the half off the backing paper and onto the chamber cover, finally teasing it carefully into place using plenty of water and two cocktail sticks. (The outside strips need extra care and are attached to the box part). Repeat with the other side and remove all water carefully prior to varnishing.
Next a coat of matt varnish to fix the transfers in place after they have dried.
Lining with transfers
Fox Transfers: a complete lining kit for about £50
HMRS Transfers for lettering
Book:
Painting and Lining by Ian Rathbone