My O Gauge Journal on
Modelling the GWR
A personal Journey
GWR 0-6-0PT 13xx locomotive by CRT Kits
Introduction
I am basing this kit on the preserved loco at Didcot Number 1369 as
shown below.

The kit instructions are of 4 A4 pages with clear 3D drawings to show construction. Although fret items are not numbered they are relatively easy to find. At this stage I am a little concerned about the thinness of the chassis plates and the con rod laminates. The con rods are not jointed and this may be an issue later on but I reserve judgement till then.
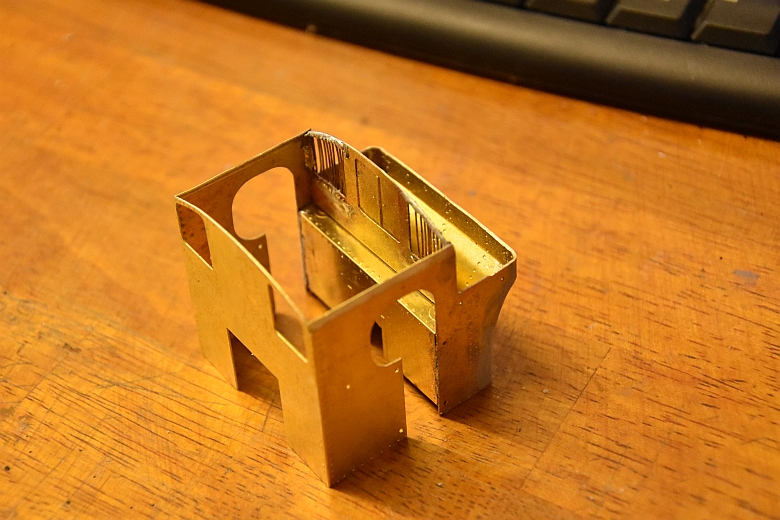
Making up the chassis.
The spacers are to be soldered to the chassis frames. Not
an easy option, (I would prefer that they were screw fitted instead)
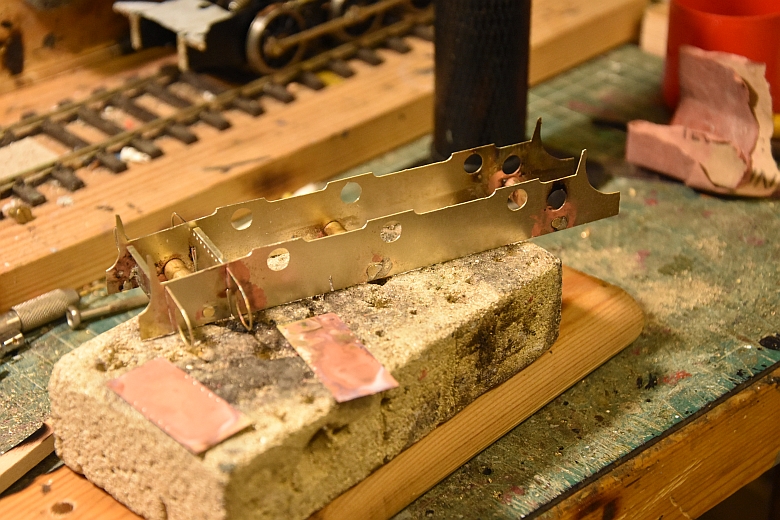
Here the chassis is soldered up and the front cylinder supports are also soldered in place. It is still easy to twist the chassis at this point as most of the support is on the top edge of the chassis and the thickness in my view needs to be increased..
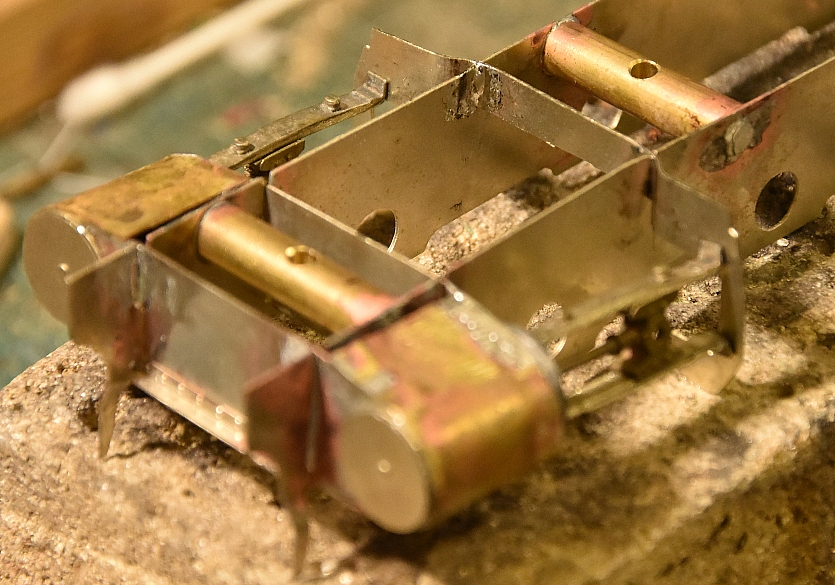
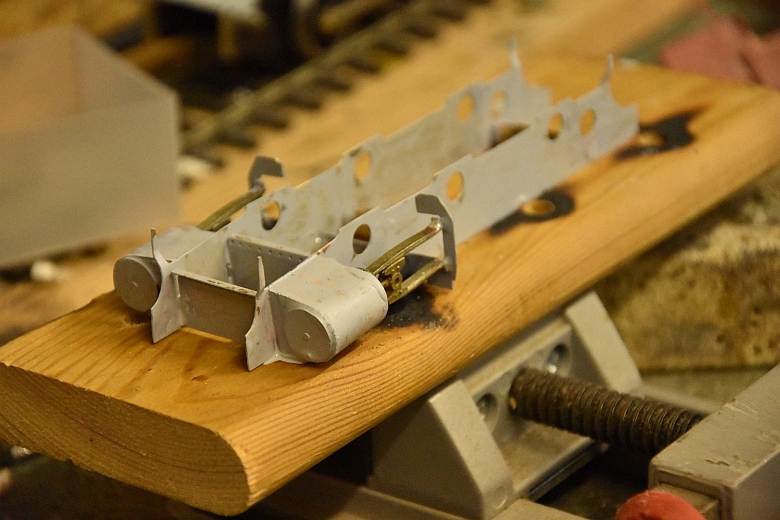
The slots for the motion bracket appear to be too far back from the cylinders. To allow them to give support to the slide bars I have had to jiggle them as can be seen above. The slots in the etch need to be moved forward a couple of mm. However, the chassis has now been primed as shown below.
The slide bars do not have 'pegs' on their ends to help secure them into the rear piston covers, but I was able to 'craft' them from the attached sprue. I used epoxy resin to attach them to the piston covers and soldered the other ends onto the motion bracket. The wheel sets have been put together for easy fitting. The awkward ones being at the front where the piston chambers are. Perfectly doable with a bit of jiggling!
Rather than use the brake shoe brackets in whitemetal I decided to drill holes in the chassis and use brass rod to suspend the shoes that way. The shoes appear to be handed and (da da!), I had three left and one right shoe. But once painted black noone is the wiser!
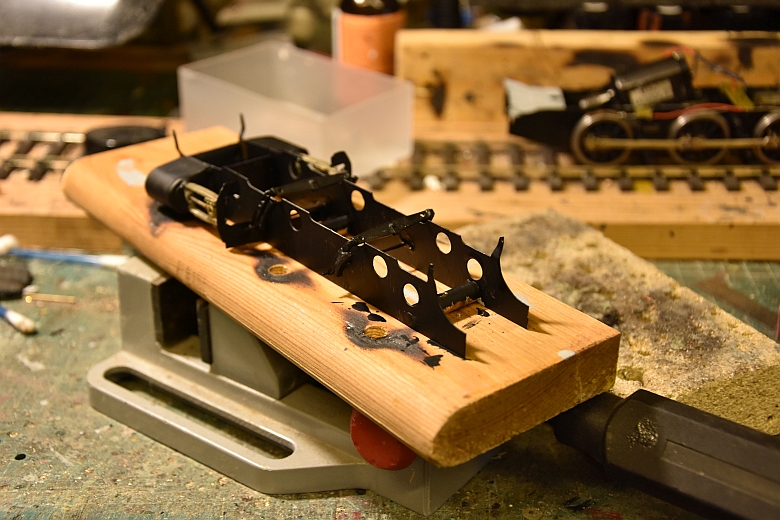
At this stage its important to consider how the loco will be motorised. In the instructions it mentions the central axle as being the driving source. The motor and gearbox I purchased for this loco was from ABC and its small, but powerful. My suggested positioning is shown above. As far as the body is concerned the motor may well be hidden by the firebox sides with a little cutting necessary on the resin tank to house it. Once I have started the body I can test this out.
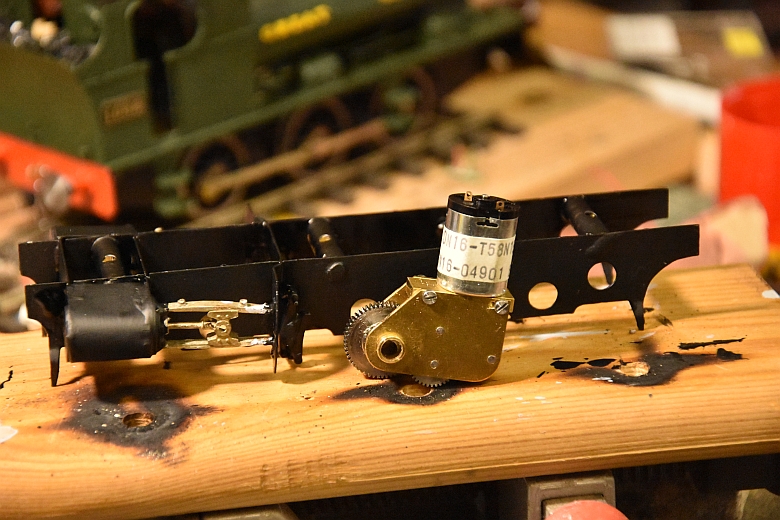
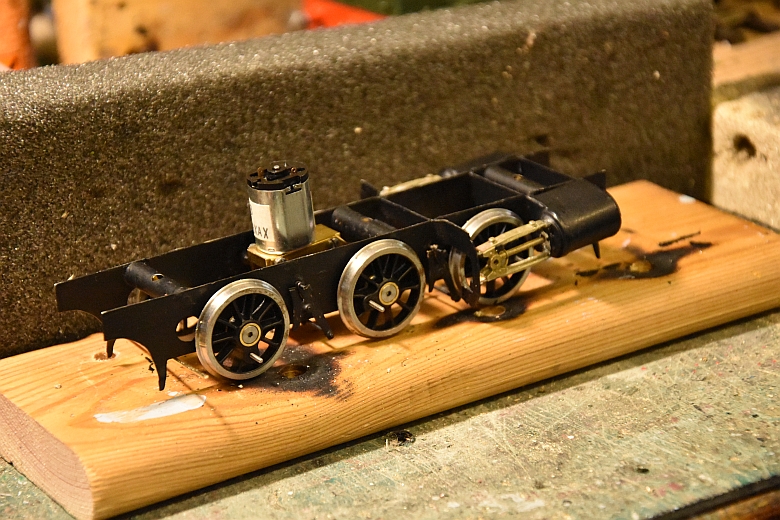
Here the motor is installed on the middle axle. The brake shoes in the kit were replaced with brass ones and hung from brass rod. that preserved loco has as different set of hangers than those in the kit which are white metal and quite fragile. The con rod holes were much larger than the Slaters bushes and a sloppy fit but this hasn't proved to be an issue as when tested the chassis ran smoothly.
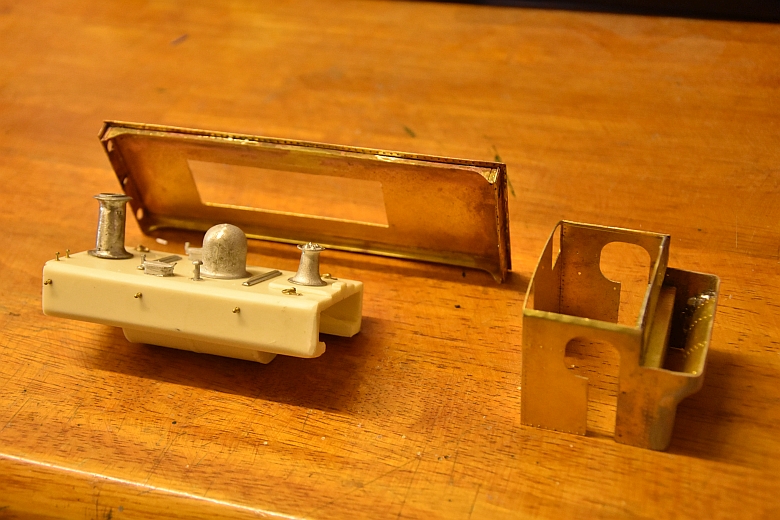
A start has now been made on the body. The footplate was built first. followed by the steps. Then the cab and its floor. The boiler and tanks were then setup with the detailed parts as shown below. I drilled out the chimney so that when the decoder is fitted the sound will come from the smoke box area.
I first soldered the grills over the rear windows using the thin brass rod provided and then bent the back wall the wrong way round!! Not a problem for me as I had a spare back wall from another kit so I utilised part of that to give the correct profile inside the cab. If anything it adds to the strength of the cab as you can see from the illustrations below!
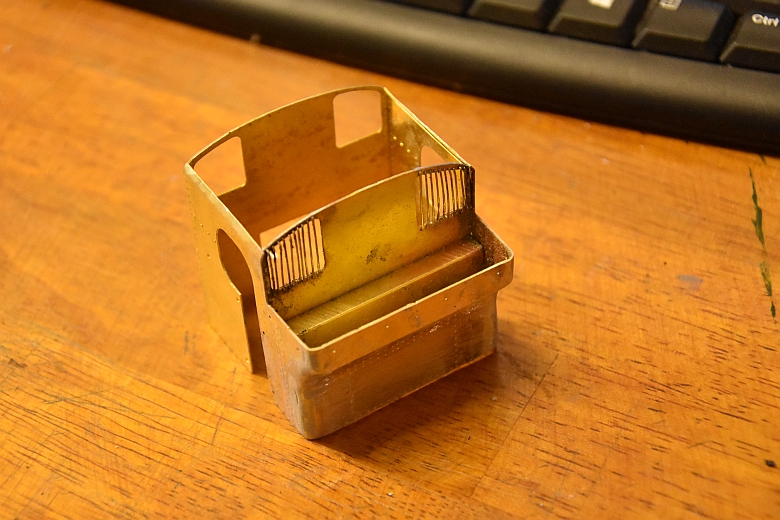
The rear corners of the cab are rounded and I filled the gaps in using low melt solder and filler to achieve the smooth finish. A first coat of U-POL Acid 8 primer is applied and left to harden over night.
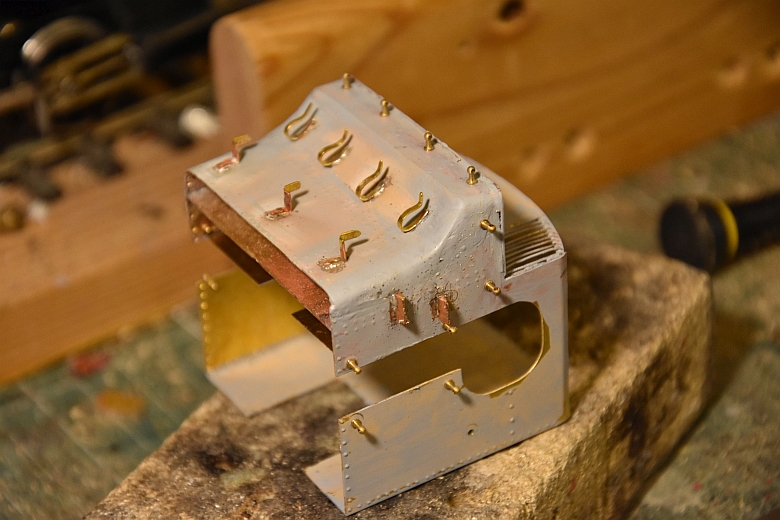
A combination of super glue for the hand rail knobs (16) and soldered steps, brackets and hooks (11) are installed next. Cab beading around the bunker has been done it remains for the beading around the cab side windows to have them done.
Parts required:
Slaters wheels x3 (7844DT)
ABC gearbox and motor (DN16 -T58N1B)
Guilplates numbers
ESU decoder and sound chip (55461) from South West Digital
HMRS transfers