O Gauge Modelling on the GWR
A personal Journey
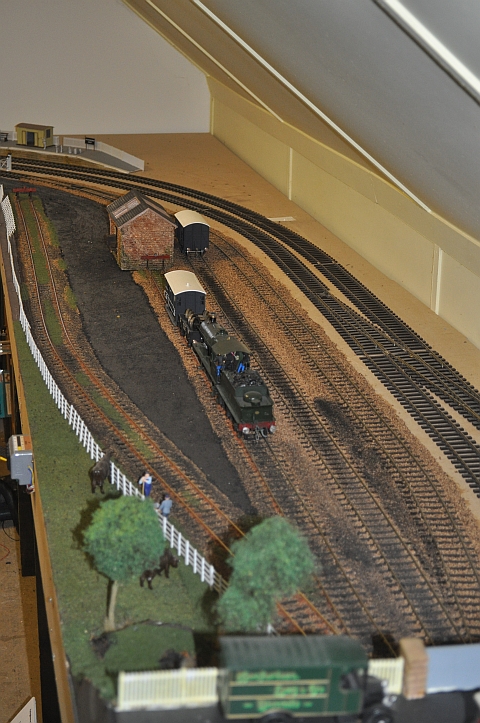
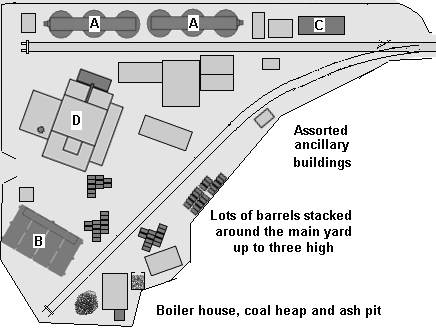
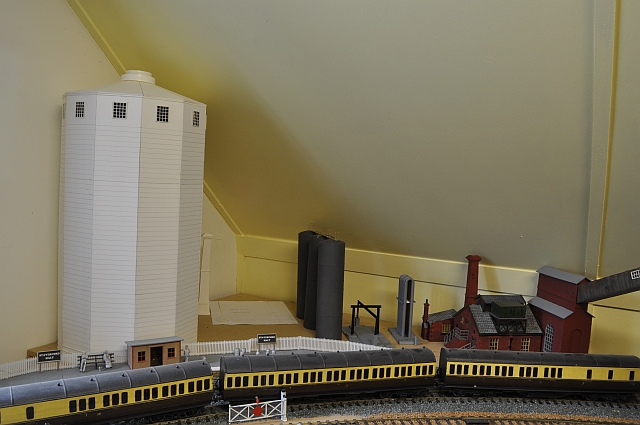
Industrial complex based around Longhampton Bridge up sidings section
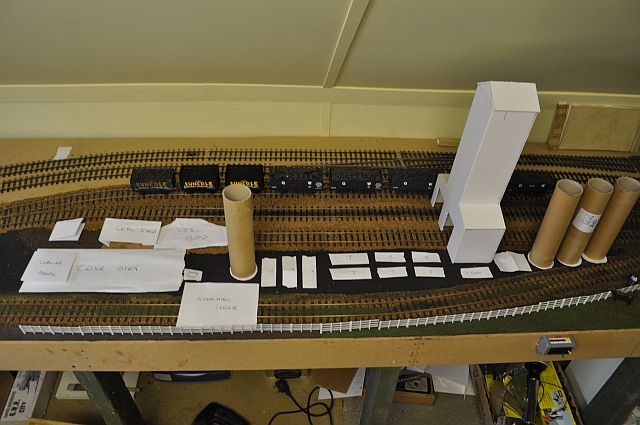
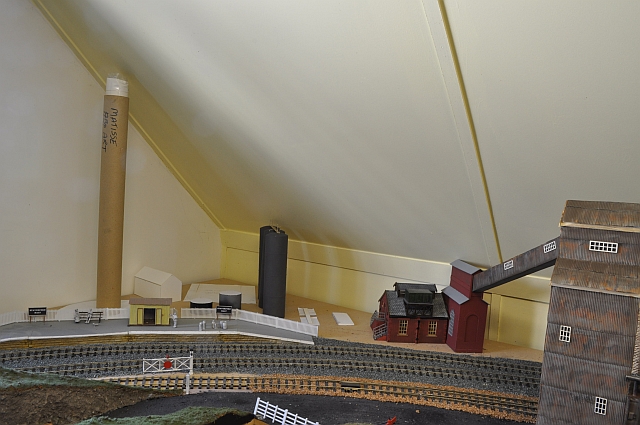
This is the area under consideration for development as an
industrial complex. The right hand side houses the mainline. There is a
connecting siding from a turnout just behind the small goods shed to a
coal mine around the other side of the layout. As with the creamery this
is a private line. You can just see the crossing gate in the top left
hand side of the picture that separates this form the rest of the
layout. Up on the right is a blank space behind the halt, ( I have
considered removing/moving the halt to this end of the curved mainline
as it presently is smack alongside the tunnelling i created to split the
layout into two parts). Plenty of room for thought here.
The goods shed has been moved away, leaving almost a blank canvas. I
don't intend to do much with the track except shorten a length is
necessary to allow for a building complex to be built.
|
 gasometer construction |
Click on any of the images here to see a full size version of them.
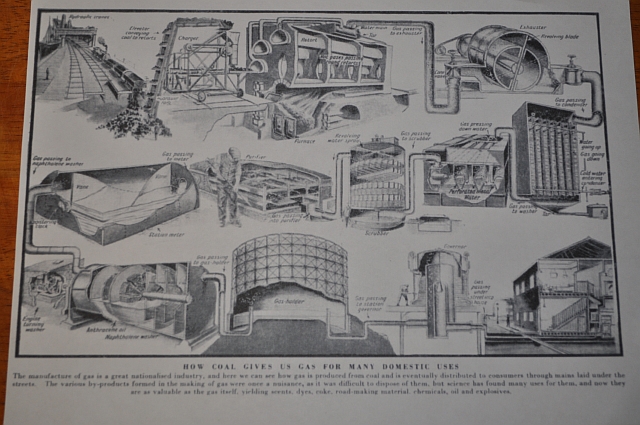
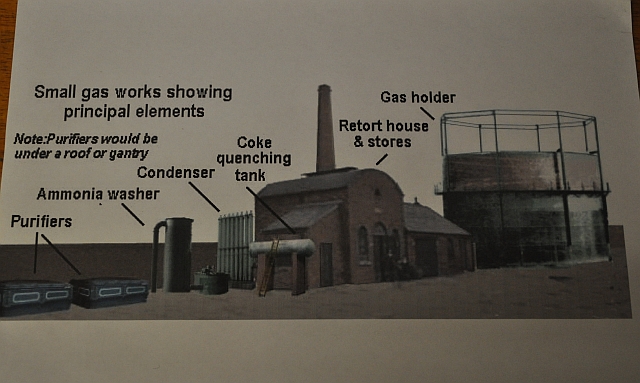 Small gas works and buildings |
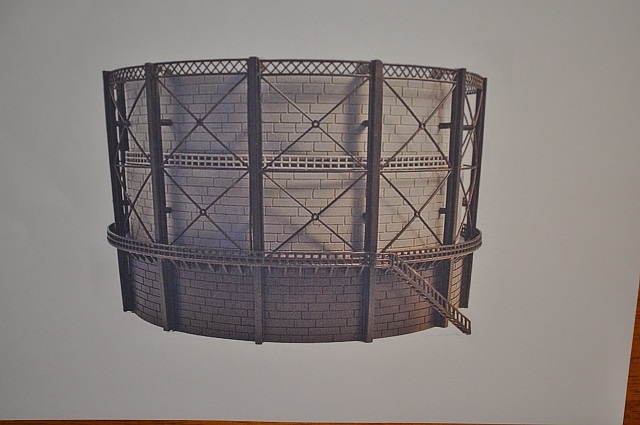
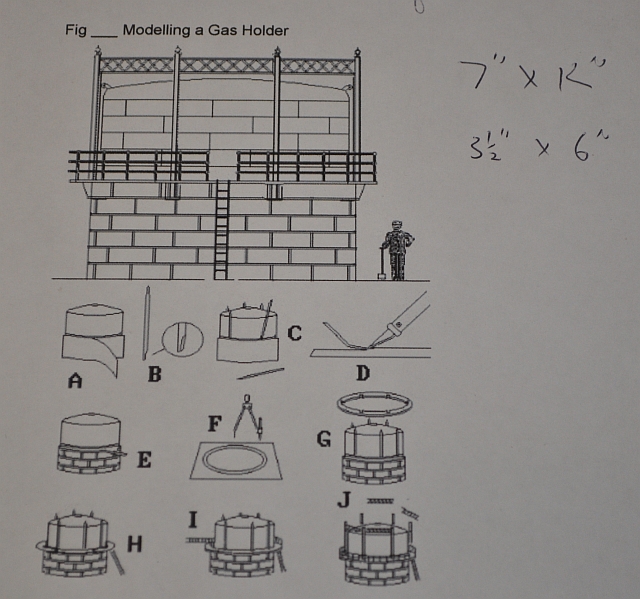 Making a gas holder |
These images are a start to get me thinking. First i need to do two things, create a reason for having an industrial complex there at all and secondly what it will look like and how that will be arranged in the space provided.
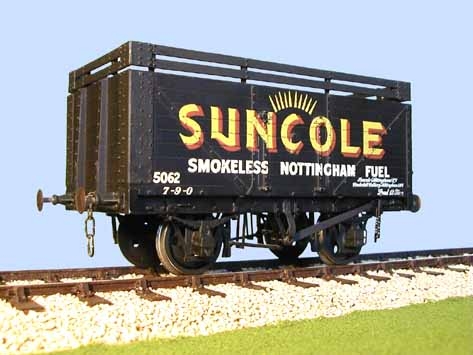
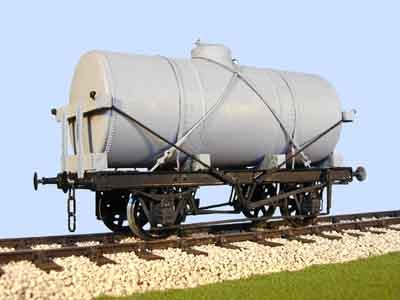
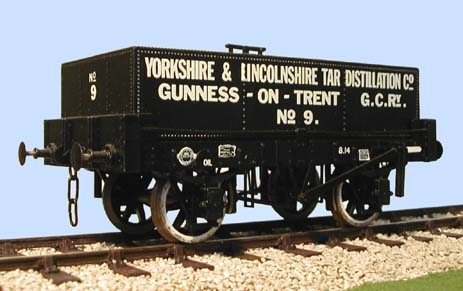
Next thoughts: A tar and coke factory might be more in keeping as it will feed from the coalmine. Gasometers will need to take up an extensive area to look real and the space is somewhat limited in there. Slaters will provide the rolling stock in the form of a square tank wagon, conventional tank wagon and a PO coke wagon with extended sides etc.
 |
 |
As for the buildings
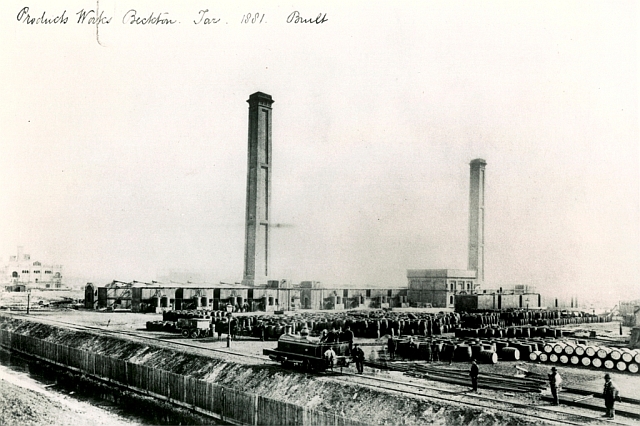 |
This old picture of a tar works shows the number of barrels used pre tankers to transport the tar.
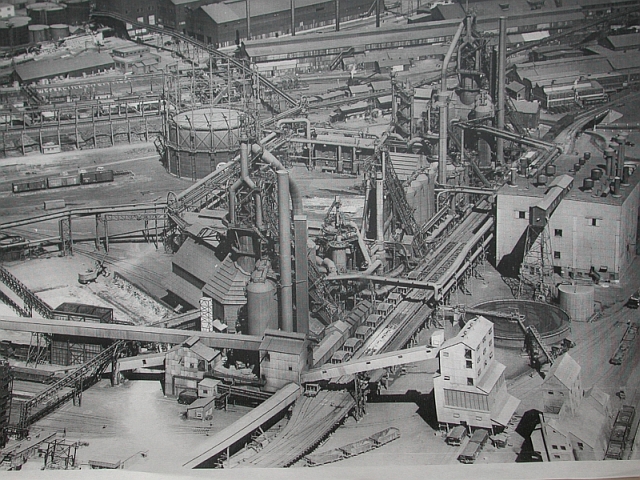 |
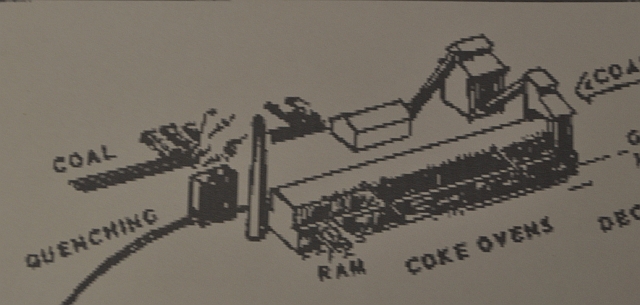
This coke plant picture has every conceivable building in it that you might want to create. What a challenge, but i suspect that my final design will be a little more simplistic!
| My thinking now is that there will be smaller inter-connected buildings with lots of pipes to see through joining them together. |
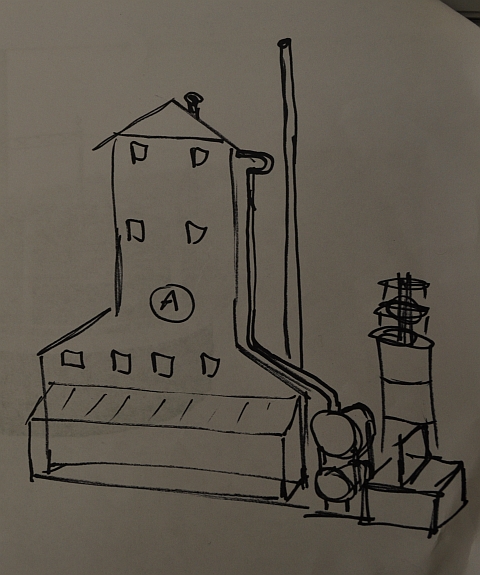
 One Tar works plan suggests smaller non connected buildings which I could inter connect with droves of pipework. This plan would fit nicely into the corner but without the siding on my layout as i chose to remove it some time ago. Back to the drawing board! |
The main plan now has moved onto a tar and coke works. latest plan shown below. Buildings need to be separate and broken up with pipe works and multiple tanks both vertical and horizontal.
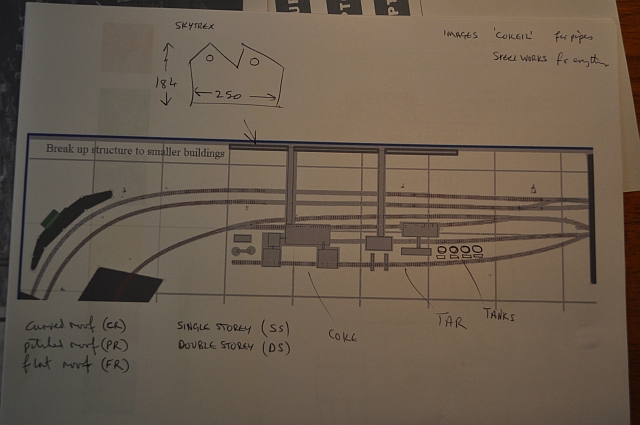
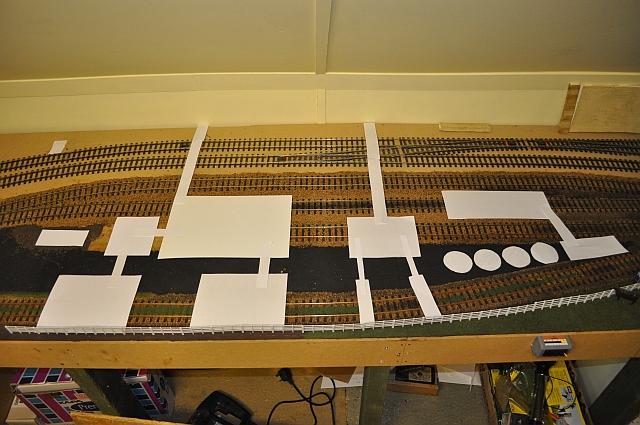
Here are some plates for adjusting buildings etc on the site.
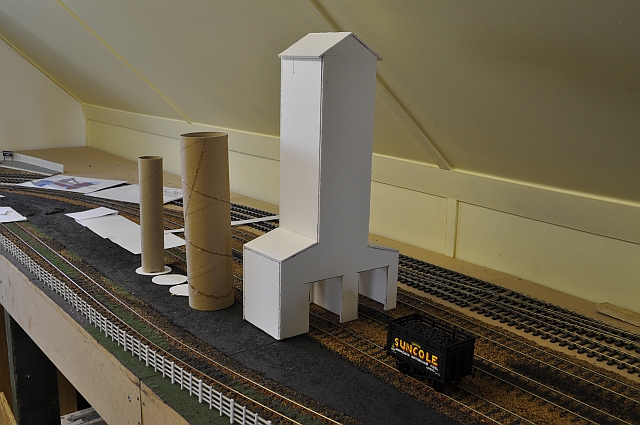
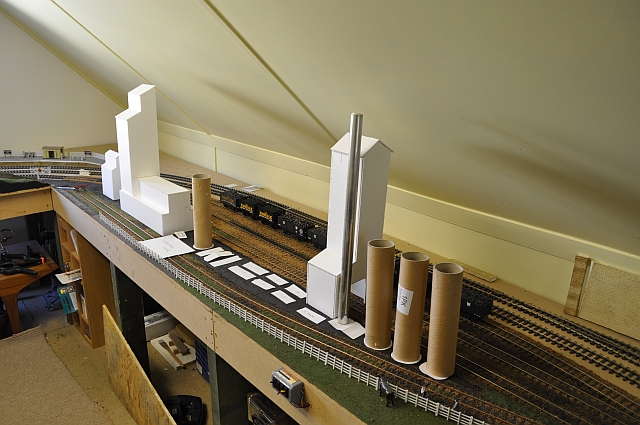
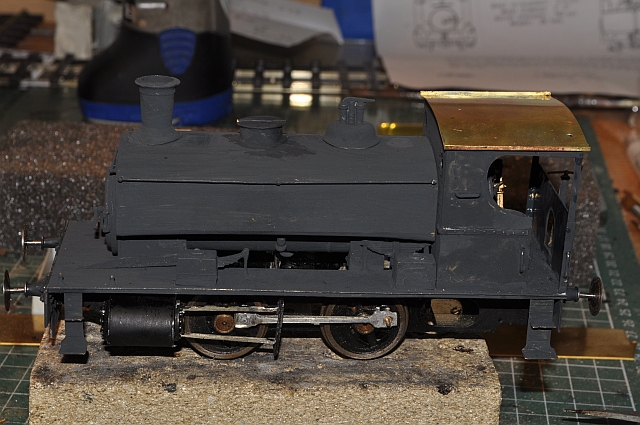
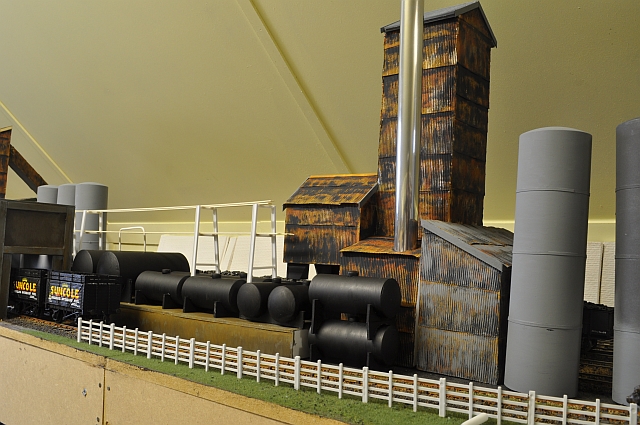
Ok, having revised what I can develop here, i have put the first mock up of the coke tower in its place. A number of vertical and horizontal tanks will be necessary all piped together to create the feel of a refinery.
 Here is the updated plan of the industrial complex. There will be a connection over the mainline to a low relief Gas works. The site is split into two with the tar works to the right and the coke works to the left. A dozen horizontal tanks will be positioned where you can see the white strips of paper. detail at the side of the tall building is shown here |
 Pipework and a chimney to the side and two tanks one on top of the other, with a cooling bath beside three vertical storage tanks. |
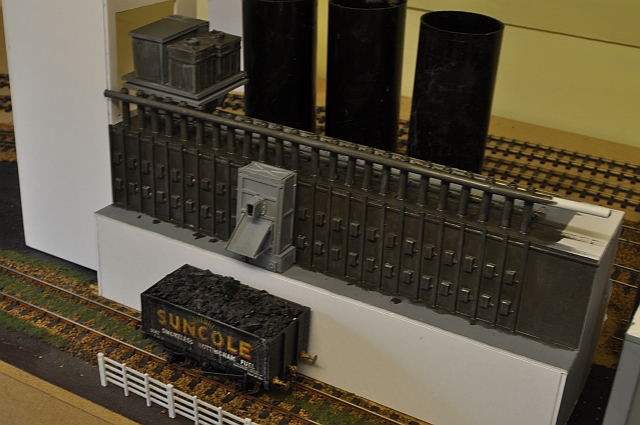
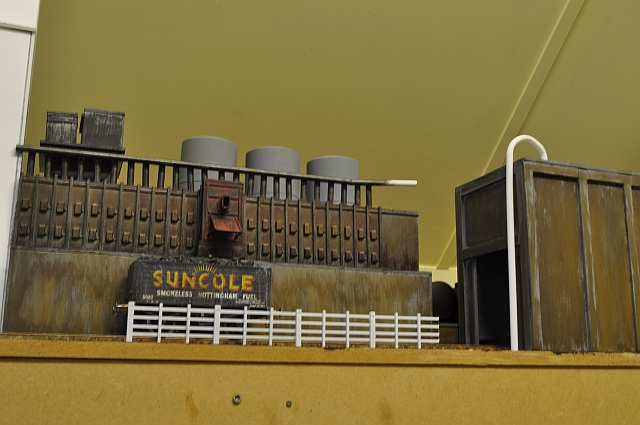
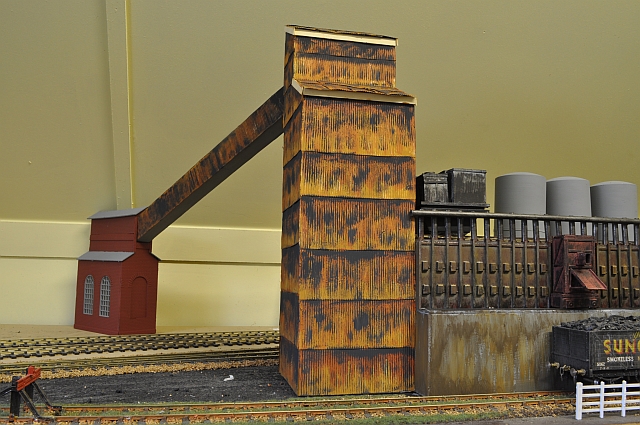
 The coke part has a long building which makes up the coke ovens. A small rail carrying device supplies coke to the ovens via top feeds.4 other buildings are situated around the ovens as shown. I have realigned the ones on my layout to facilitate the available space with out compromising the rail connections available. Almost all of the buildings will be covered in corrugated sheet metal pieces, (each 6cms x 3.5cms)
|
 The coke smelter. Put pipes on the top of the furnaces. more detail needs to be added but its taking shape. |
 The tar making building now has two additional lean-tos on it, one on stilts and the access arches have been widened. |
 The coke furnaces have had a preliminary coat of paint. The detail was made up of plastic sprue pieces and strips of Plastruct. A lengthy laborious job but enough to give the illusion of the furnace. Another coat of paint and dry brushing will bring it up to a believable representation of a furnace. The feed trolley that runs along the top is also finished. |
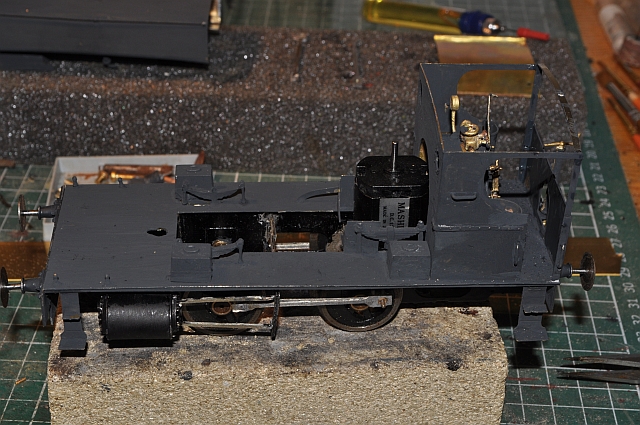
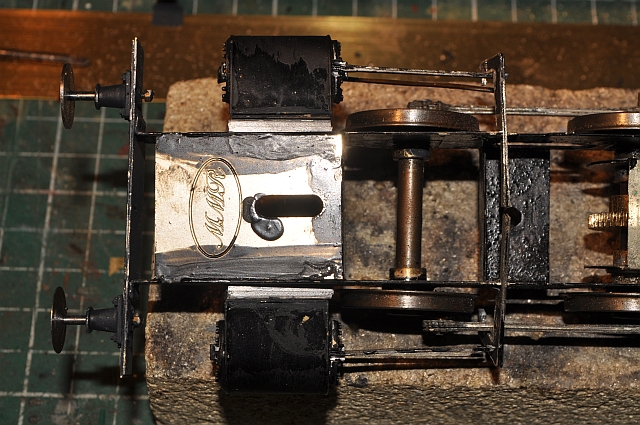
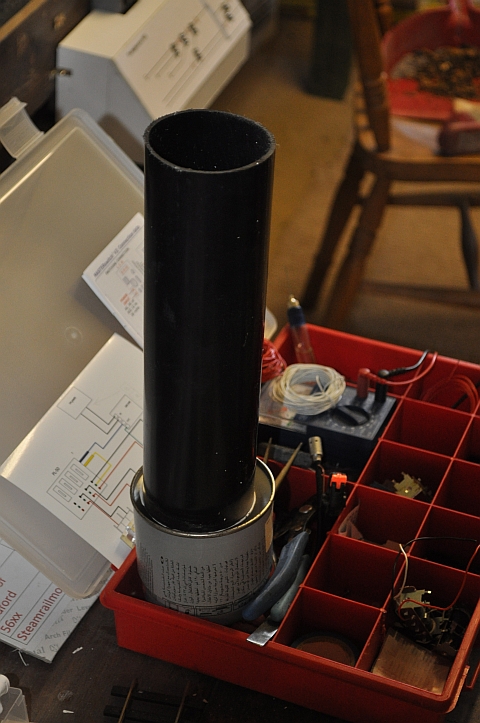
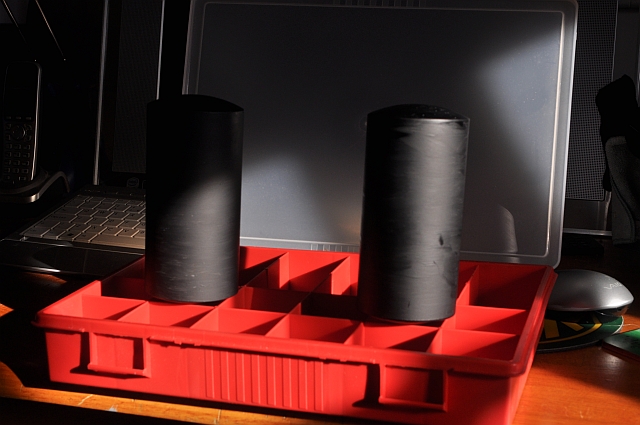
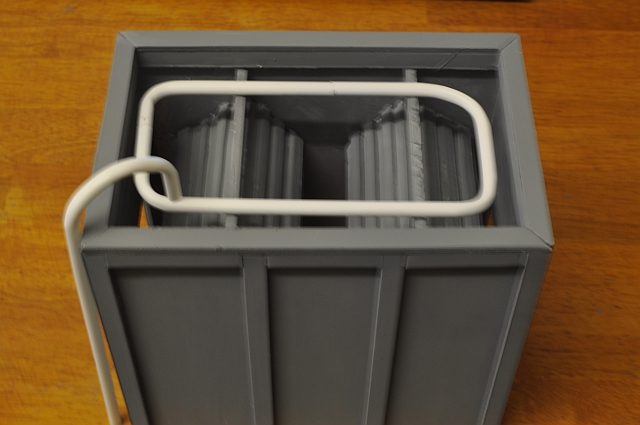
 I thought I'd try a different approach to adding ends to my tanks this time. So I used the well tried cobbled approach. Using the bottoms of a couple of gas canisters which are not quite hemi spherical but enough to make excellent ends, I pour plaster into the cylinders and allow them to set, (about 30 minutes). To allow for air to be expelled when the second end is made drill a hole in the cylinder where the filler cap will be, (about half way along). Put the plaster into the bottom of the canister and then carefully push the tank with one end filled into it. The air will be expelled through the hole you drilled and the cylinder will sit nicely on the gas canister bottom. Leave well alone now for about 30 minutes. Once the plaster has gone off they can be removed from the canisters. I put a little oil on the metal surface first to help with the separation. Clean off the excess plaster and you have a nice tank with domed ends. |
 The feeder from the coke ovens is now made up of card and plastic and received its base coat. Here are the extra for the coke furnace now insitu before finishing. |
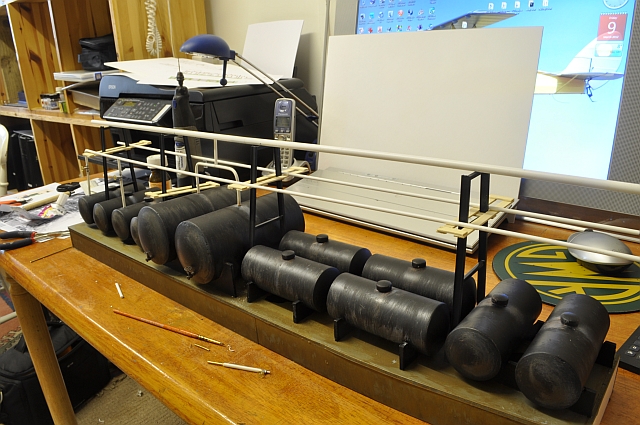
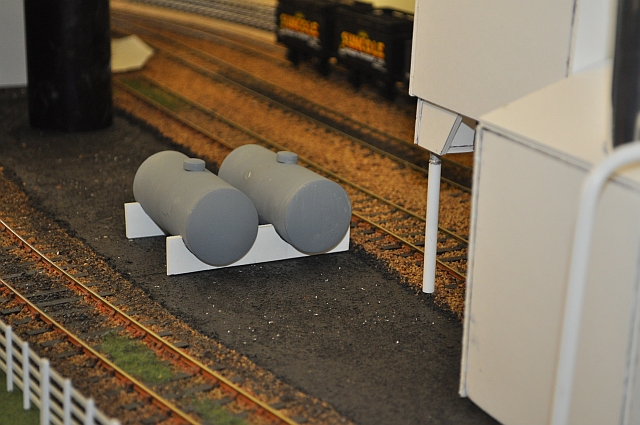 All the 12 tanks are now made up and undercoated in grey. I used screw covers for tank filler caps. Here are a couple on simple plinths. |
 The vertical tanks required a larger 'dish' so I utilised a Gaz canister. Just as effective and a simple way to create a perfectly domed end, ( or in this case the top). |
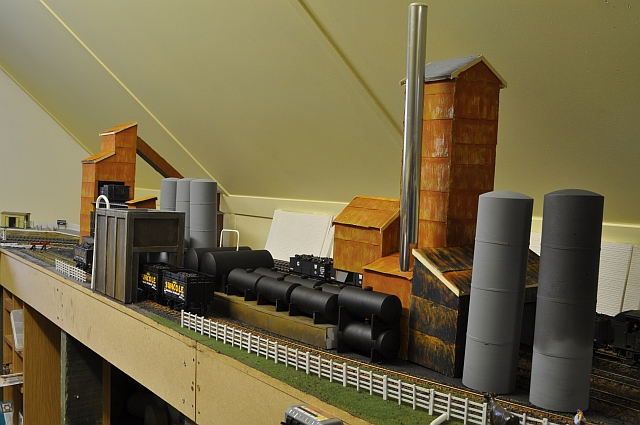
 Now most of the tanks have been created and a test in position to see how they look. There will be a lot of pipe work necessary to join everything together etc. |
.JPG) Now the not so glamorous bits. Painting all the tanks and their supports. These upright tanks have section detail, (paper strips), and then an undercoat of LMS freight grey and a silver spray finish. here they are in the first stage of painting. |
.JPG) The twelve horizontal small tanks painted. |
.JPG) All the supports for all horizontal tanks. |
 The two large horizontal tanks painted. |
 The tanks are now in place on a platform. Vertical tanks rearranged again and checking for clearances with a coke train. Click the above for a larger view. |
 The internal workings of the coke quencher are now almost complete. It consists of two triangular ribbed inserts with a circulating water pipe over on two struts. Enlarged the doorways to give added access to wider trucks as the clearance was catching the brake levers. |
| Putting paint onto the plain walls to give it that lived in look! Click pictures below for a larger image. |
 More coats will be added after these first ones have dried completely. |
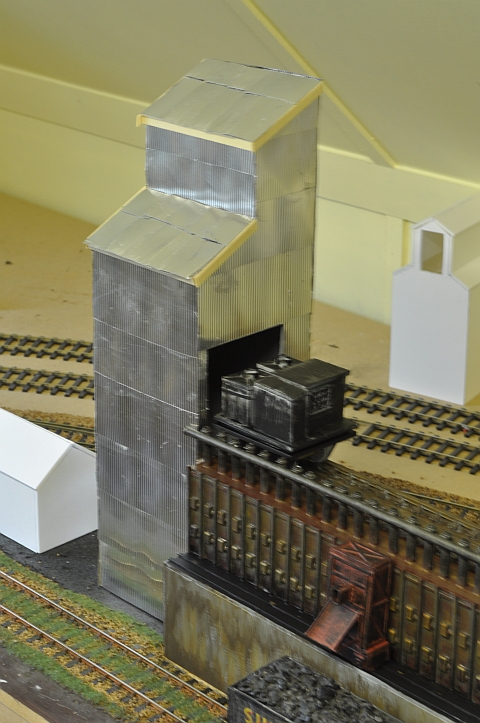 The corrugated cladding has now been cut and stuck onto the coke tower. This is produced by Kemilway in long strips which you cut to length depending on the building you are cladding. At the moment its shiny but after weathering will take on the 'real thing'. |
 Having completed all the buildings with cladding the first wash coats have now been applied. To start with, a combination of light rust and brake rust. |
 The buildings now have their third colour applied. The lean-to nearest the camera has had a grey layer added to lighten it up and the rest of the buildings may be treated the same way. I've built four supports for pipe work which is in the background using Evergreen strip styrene. |
 One alteration was to the small building over the tracks. As I ran out of cladding i decided to make use of an old engine shed Kittle kit and create a new building. This will better suit the other buildings i will have in the gas works proposed for that side of the layout at a later date. |
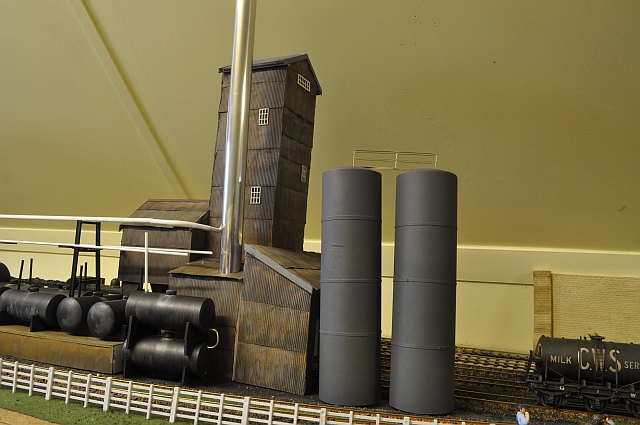 Here you can see the finished paintwork on the tar tower and the use of small windows to add realism? The large pipe work has been extended up the side of the tower but is obscured by the chimney and the vertical storage tanks now have walkways. |
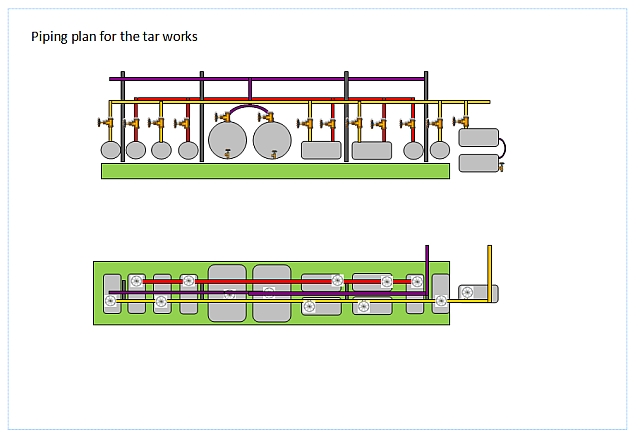 Time to concentrate on the pipe work for the tanks. From this drawing I created I am to build a structure above the tanks with cut off valves for each tank. The pipes are themselves to be made from plastic as this will look like lagging when painted black. Click the picture for a larger image. |
 Here is the framework in place. The tanks have been slightly weathered with staining. |
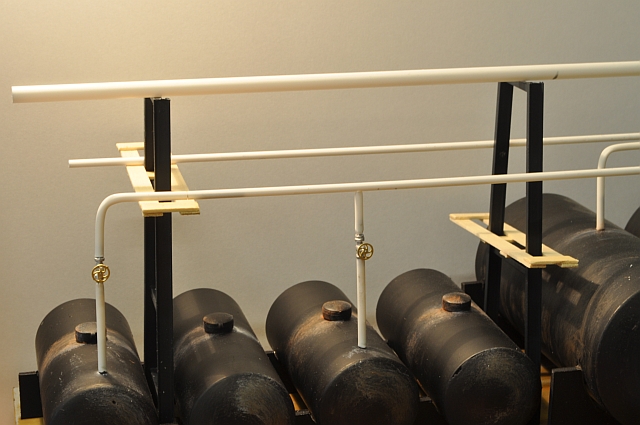 A close-up of the valves. I use Duncan models industrial tap valves, but the wheels are from Wizard Models. I use their 12" 5 spoke pulley wheels made in brass as they look the part! |
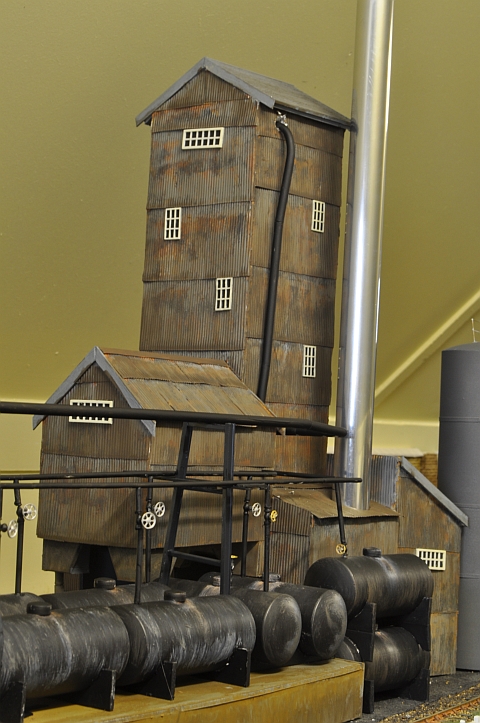 Here is a shot of the tar tower with the addition of some windows from Invertrain. Simple stuck onto black paper and then applied to the corrugated facia. |
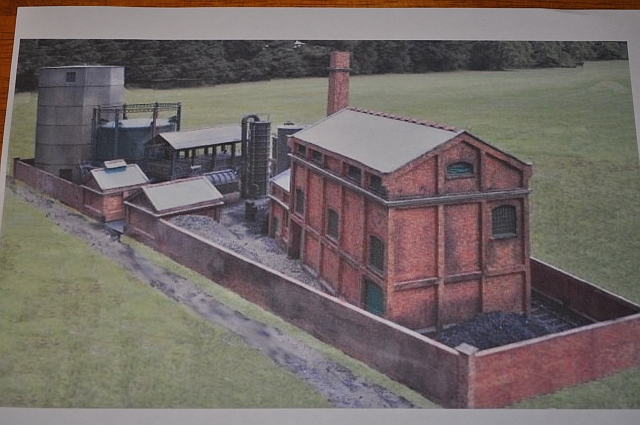
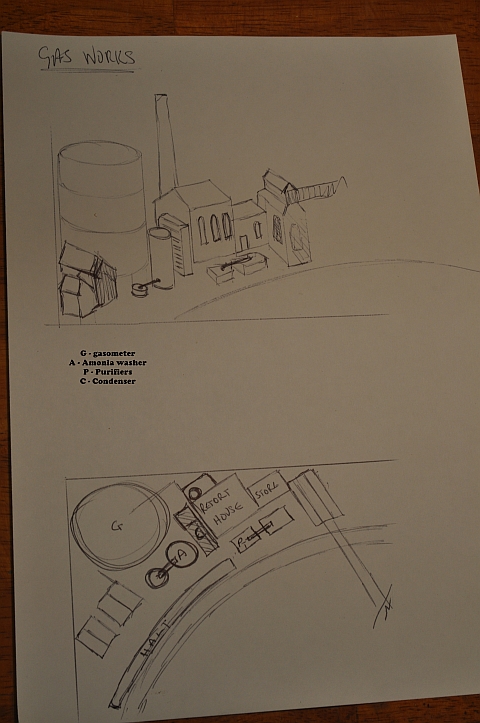 Here is a rough sketch of the gas works that will complete the industrial area of my layout and will connect over the mainline to the coke works etc. During my investigations into appropriate gas works types i came across a series of models produced by Russell Thomas. With his permission I have made them available by clicking the picture above. He may be contacted on thomasru@pbworld.com |
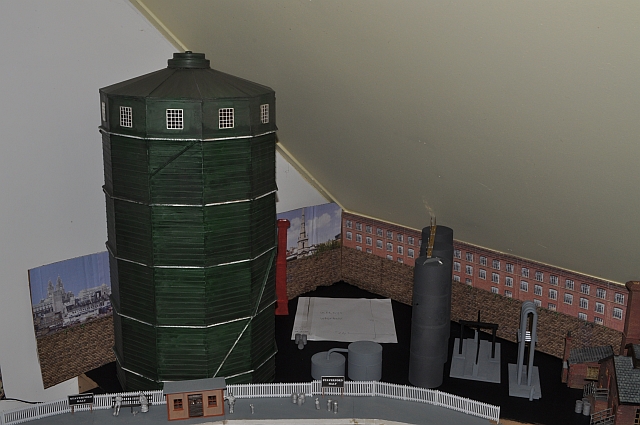
 This is the corner site of the gas works. the large roll on the left is where the gas holder will go. A brick wall will separate the works from the railway and the halt, but a door will give access to workers alighting from the halt. |
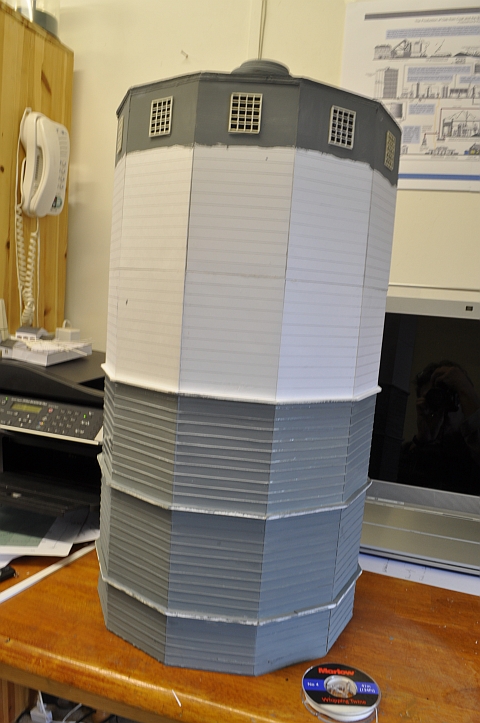
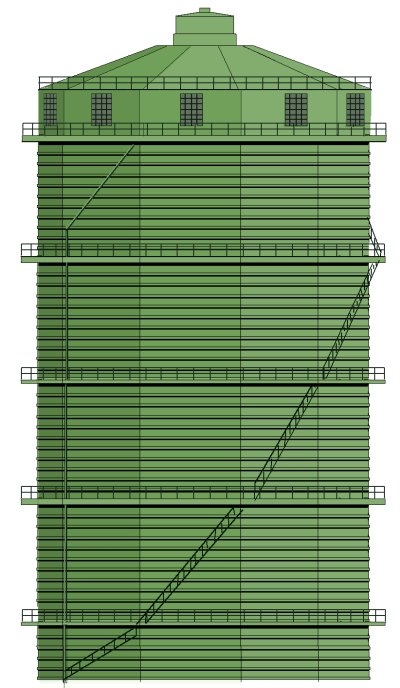 The gas holder. I calculate that it will be 65cms high with a diameter of 30cms. i intend to make it out of polyboard with plastic detail stuck on the outside. |
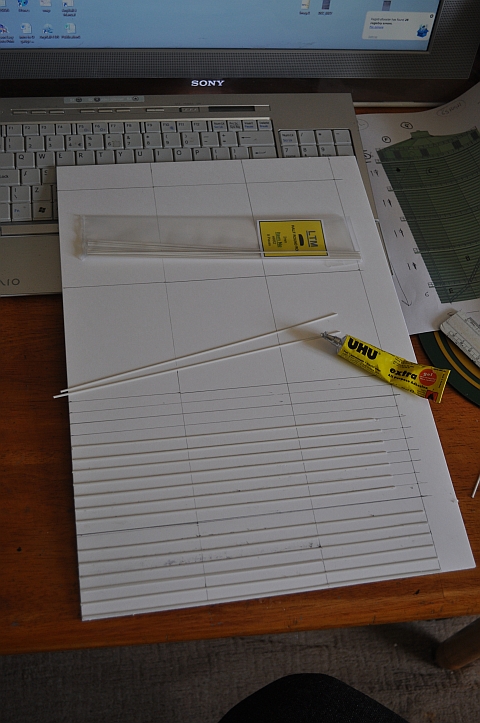 Here the plastic half round rod 2mm is being stuck on three faces. I think there are 16 sides and the top will be constructed from 16 triangles, (9cm base, 16.2cm perpendicular height). This will give a shallow rise as shown in the above diagram. The tower consists of 6 layers the top and bottom layers being 6cm high the rest 11cm high. Each layer has either 5 or 10 strips running across it, (except the top 6cm layer which is plain with windows). The top of each layer has a platform and a single row of steps leads up from one layer to the next. |
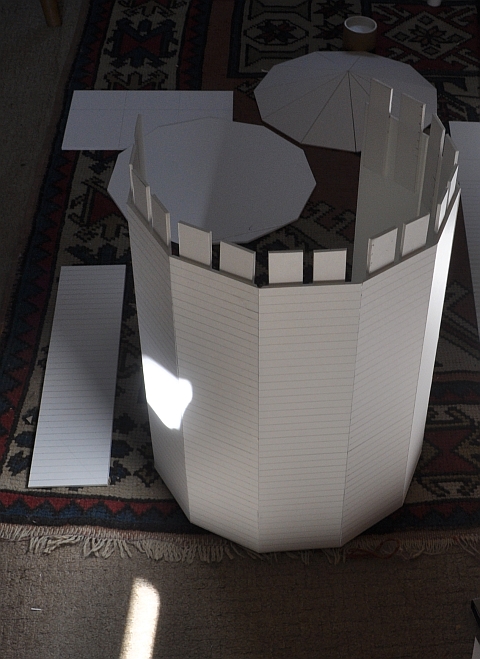 In retrospect, I've ditched the idea of sticking strips of plastic on the flat sides as it has problems once you start to bend it to make three faces. Instead I now will cut each face separately and glue it onto the base. As the A3 card i use is not long enough to make a complete face I've put strengthening strips around the top to help hold the extra level and top section in place. In the background you can see the top section which is an extremely wide and shallow pyramid, just held together with tape for now. To calculate the size of each triangle my O level trig came in handy! |
 The shell of the gas holder body is now complete, (had to cut down the halt platform to get it in!). What remains is to put waxed whipping twine around each section to give the illusion of the corrugated sides, (and there is a lot of them so that will progress slowly). There are several platforms and stairs to be added also. Then finally painted green. The condenser is made up and consists of brass pipes with electrical flex providing the pipe bends along the tops and the ammonia purifier framework has been completed. Click the image to get a larger view. A couple more buildings and the brick wall along the front will complete this project. A number of pipes will be used to connect items together and more detail added as it progresses. |
As with the rest of the background I've had to put
together a diorama, as shown here so it was back to the
computer to make up suitable factory walls, buildings and a
city landscape.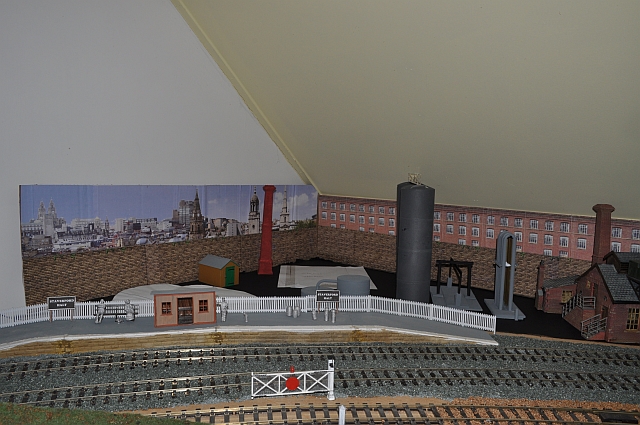 |
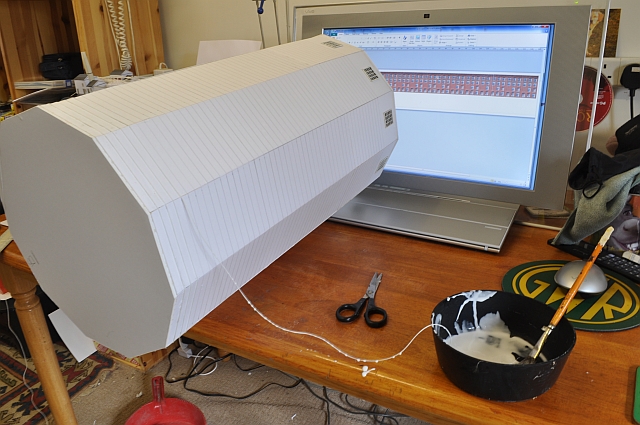 This is the process of sticking the twine in place in progress. the twine is cut to suitable lengths and soaked in PVA. This is then applied using the fingers so it sticks to the guidelines,(starting and finishing at the back so you don't see the join!). |
 Here it is half completed with a base coat applied. The platforms have been glued in place, the stairways added later on. the railings will be made from paper and painted to look as real as possible and there will be a feed pipe running up one of the sides just off to the left of the holder. I don't consider going the Full Monty here as its a distant object. |
 Here the gas holder has been completed. The green coat of paint has been over sprayed with 'dirt' to dampen it down. the landing railings and stair railing now need to be fitted. Here it is in finished condition. 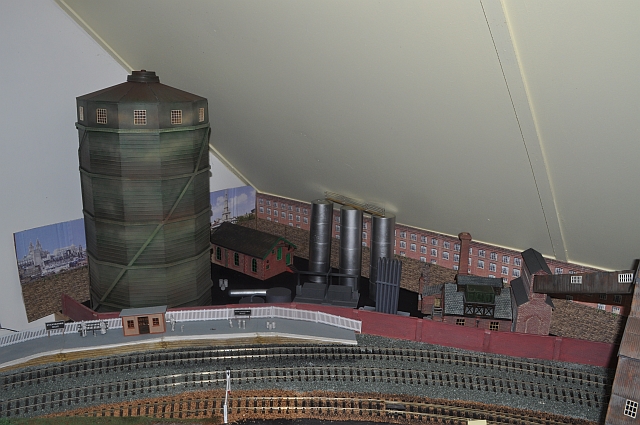 |